
Best Golf Simulator for Home (2026): Complete Buyer’s Guide

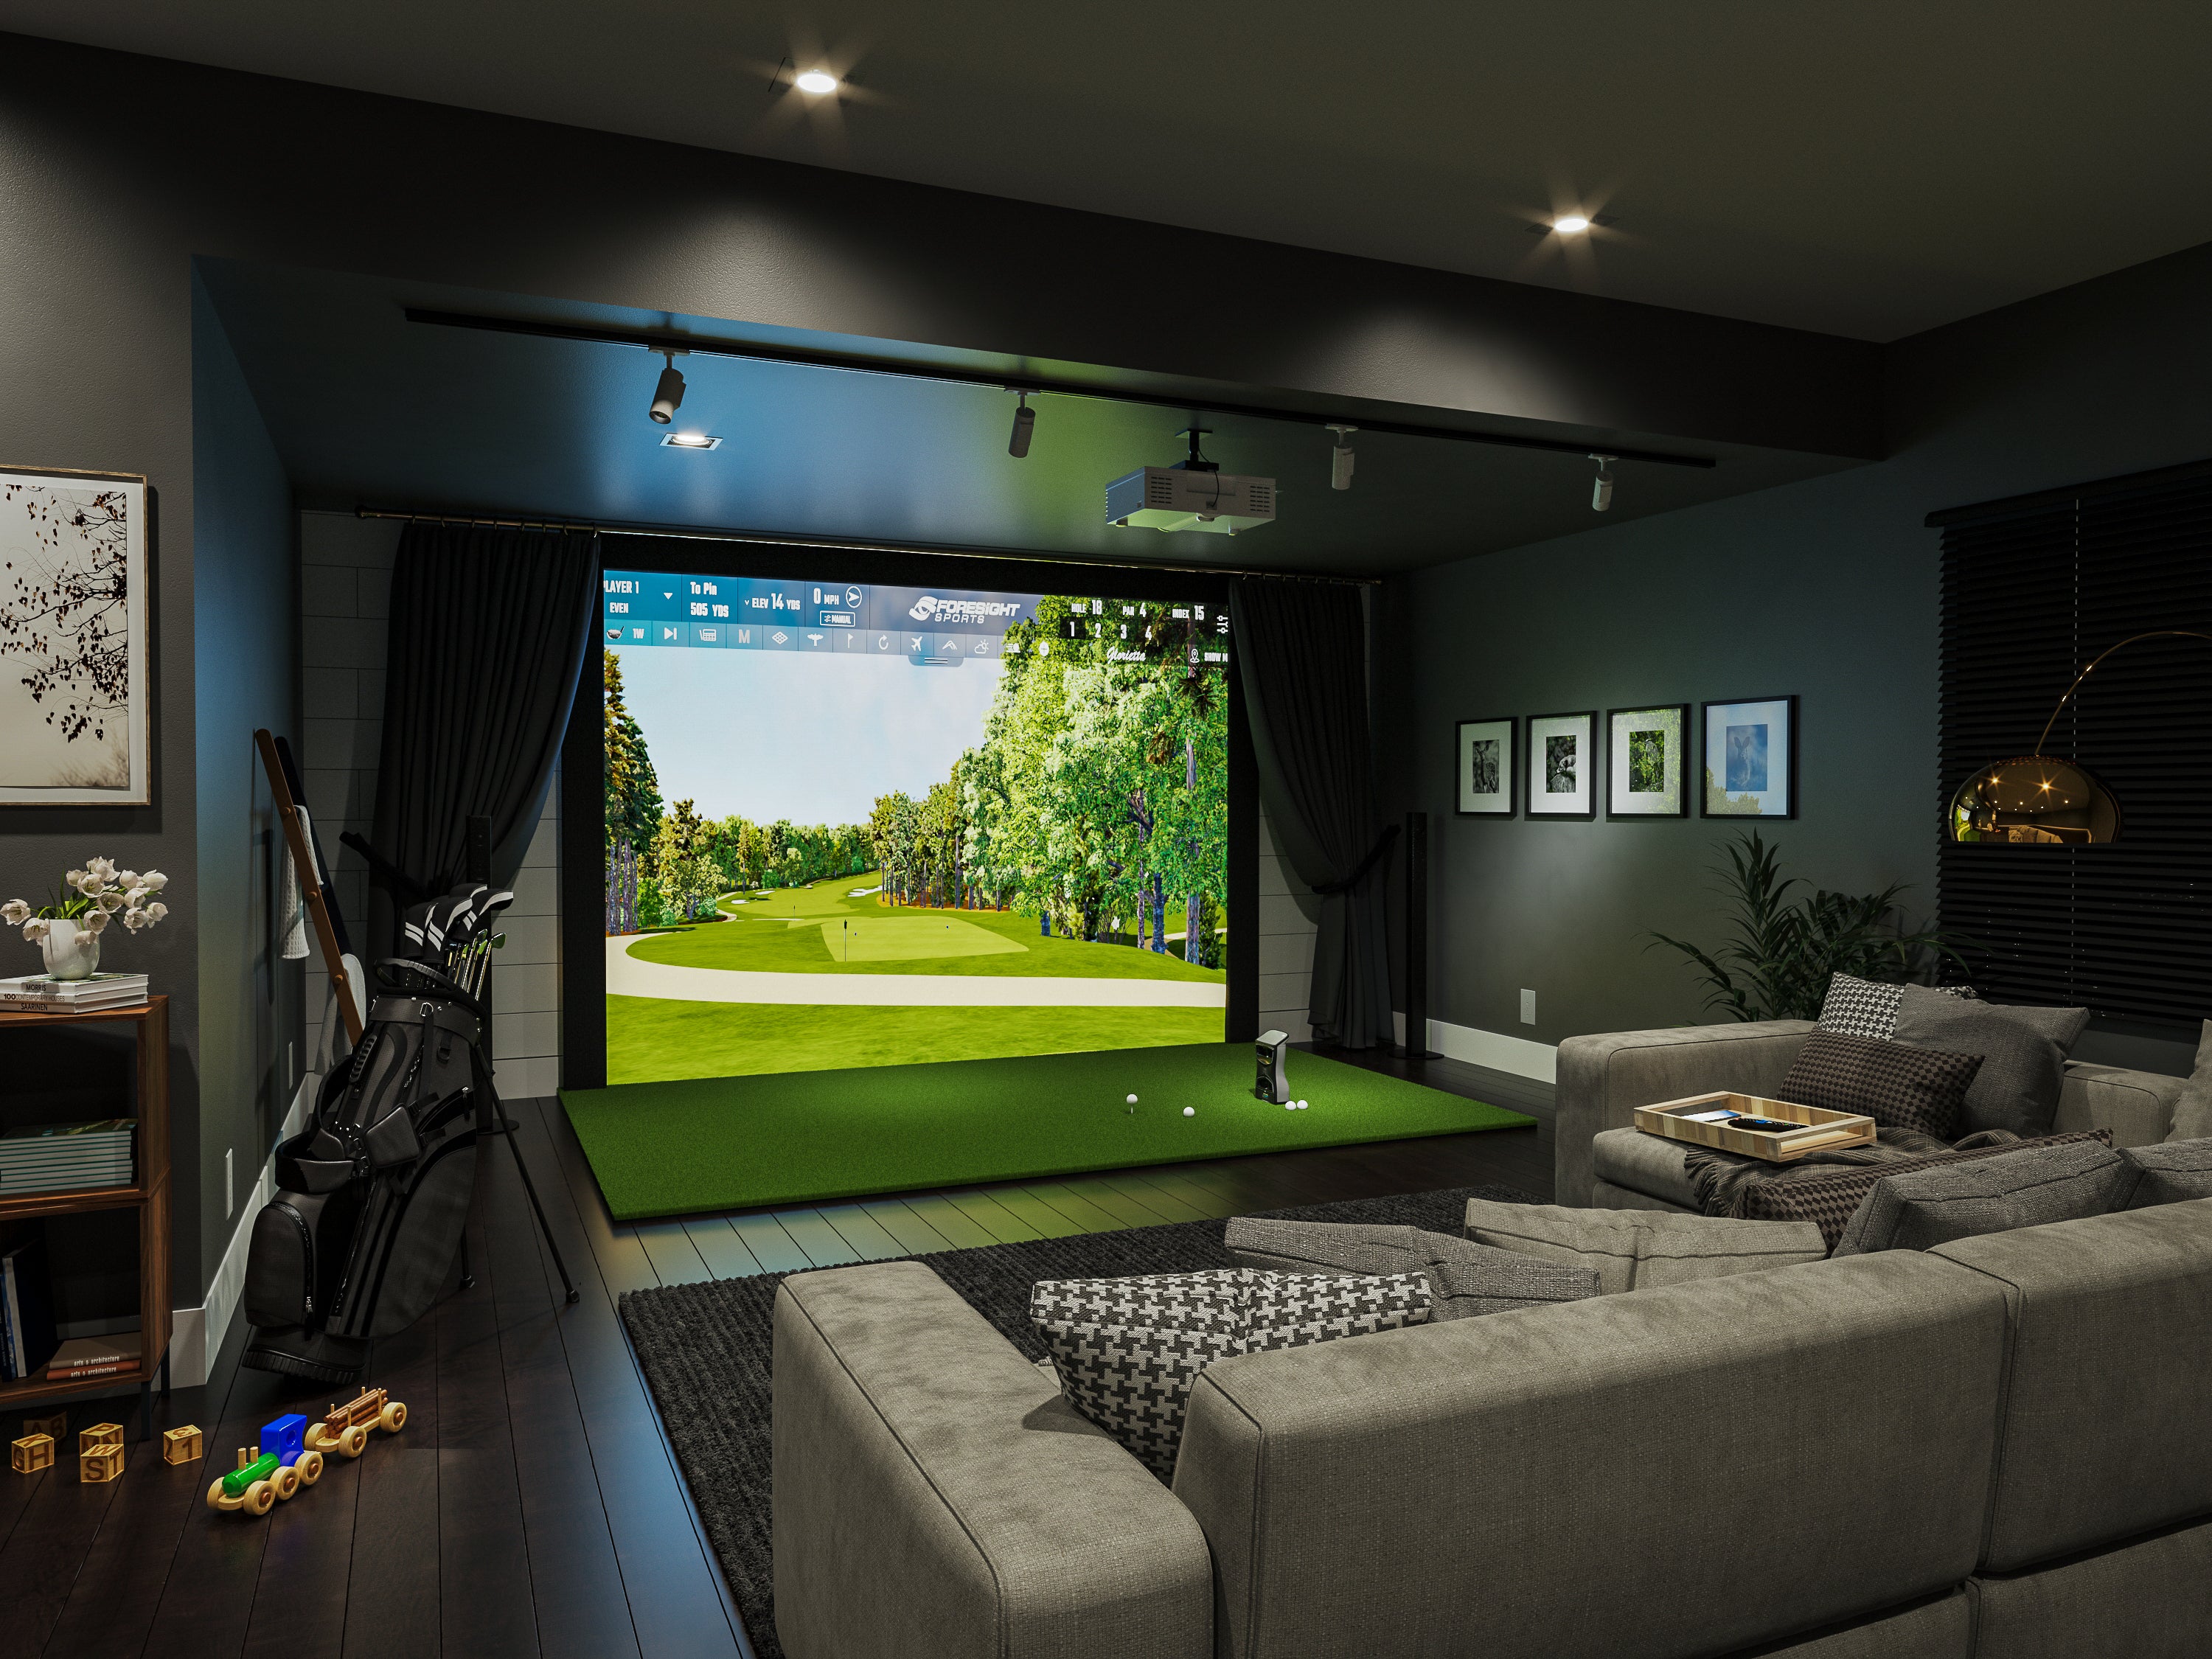
Best Golf Simulator for Home (2026): Complete Buyer’s Guide
Finding the best golf simulator for home means solving tight space math, calculating annual subscriptions, and budgeting for gaming PCs. To avoid wasting money, choose your software platform first, whether GSPro or E6 Connect, and then select compatible hardware. This independent guide bypasses retail hype to reveal real product weaknesses. Use the links below to find your specific use case, or skip straight to the decision tree and comparison table.
1. Best Golf Simulator for Home: Beginner-First Starter vs. Value Builds
Setting up the best golf simulator for home use looks easy on paper, but most beginners blow their budget on a launch monitor only to realize they still need a gaming PC, an annual software subscription, and a high-quality hitting mat. You do not need to spend five figures for a highly effective practice space. You just need to match your components to your room, budget, and practice goals.
Use-Case Snapshot: Who This Is For
- You want a repeatable home practice setup without paying for tour-level fitting.
- You want to play real courses with friends without surprise subscription fees.
- You are deciding between a net-and-tablet setup and a full impact screen build.
Start Here: Choose Your Software First
Your software choice dictates your hardware. Do not buy a launch monitor first.
If you want the community standard, GSPro, a dedicated gaming PC is required. Your graphics card (GPU) becomes a core cost of your simulator, not an optional accessory. Check the GSPro PC Requirements to see what power you need.
To skip the PC cost, choose app-based options like Awesome Golf or native apps running on an iPad. To see compatible hardware, read our guide on What Launch Monitors Work With GSPro.
---
Complete Build A: The "Starter Sim" (Lowest-Friction Entry)
This setup offers high portability and the lowest financial barrier to entry, using a net instead of a permanent enclosure.
- Launch Monitor: Garmin Approach R10 ($599). This is a budget radar-based unit.
- Space Requirement: Radar depth is non-negotiable. It requires 6 to 8 feet behind the ball, plus at least 8 feet of ball flight to the net, totaling 14 to 16 feet of room depth.
- Software Compatibility: Runs native Garmin Golf, connects to E6 Connect, and runs GSPro via a community-built API connector.
- Total 3-Year Cost: $896. This covers the $599 hardware plus three years of the Garmin Golf subscription ($99 per year). It excludes PC or optional third-party software licenses.
- The Honest Tradeoff: The R10 estimates spin instead of measuring it directly. In tight indoor spaces, metallic interference can cause missed reads. It is not a tour-level fitting tool.
- Hitting Solution: A heavy-duty golf net with side safety netting to catch shanks.
- Display: Cast your iPad to a TV, then upgrade to a projector later.
- Mat: Avoid cheap mats. Buy a mat with a dedicated hitting strip insert like Fiberbuilt or TrueStrike to protect your joints.
---
Complete Build B: The "Beginner Value" (Better Indoor Realism)
This option is for players building a dedicated indoor space who want measured spin data instead of estimated radar numbers.
- Launch Monitor: Rapsodo MLM2PRO ($699). This is a camera-and-radar hybrid.
- The Catch: You must use marked Rapsodo Precision Technology (RPT) balls for full spin data. Driver accuracy variance is a known community issue; it performs best with irons and wedges.
- Space Requirement: The hybrid design still requires depth. You need 6.5 to 8.5 feet behind the ball and at least 8 feet of ball flight, requiring 15 feet of minimum room depth.
- Software Compatibility: Integrates with its native app, E6 Connect, and GSPro (PC required).
- Total 3-Year Cost: $977. This includes the $699 hardware, two years of the mandatory $99 subscription (year one is free), and $80 for extra RPT balls.
- Screen and Projector: If you have 9 feet of ceiling height, pair this with an 8-to-10-foot wide impact screen and a short-throw projector to avoid casting player shadows.
---
The Verdict: Which Beginner Setup Wins?
Choose Build A (Garmin R10) if you want the cheapest honest path into home simulation, need portability for the range, and accept estimated spin data.
Choose Build B (Rapsodo MLM2PRO) if you are building a permanent indoor room, prioritize iron and wedge practice, and do not mind using marked RPT balls.
Look elsewhere if your room has less than 14 feet of usable depth. Neither radar setup will work in tight spaces; you will need a side-mounted, purely camera-based monitor instead.
2. Best Golf Simulator for Home Garage Builds: The Durable Workhorse Setup
Garage builds are the most common setups, but they face brutal real-world challenges. You are fighting freezing winters, concrete floors, ambient light, and garage door openers directly in your swing path. It is easy to make an expensive mistake if you ignore the physical reality of the space.
If you want a detailed breakdown of specific configurations, read our comprehensive guide on the Best Golf Simulator for a Garage (2026).
Use-Case Snapshot
- You have a 1-car or 2-car garage bay and want a permanent screen and projector setup.
- You must navigate overhead door tracks, concrete floors, and minimal climate control.
- You need durable components that handle temperature swings and ambient light.
Start Here: Software and PC Setup
Decide on your software before looking at hardware. For a serious garage build, GSPro is the gold standard, while E6 Connect is a solid second choice. If you run GSPro, budget for a dedicated Windows gaming PC. In a simulator PC, the graphics card (GPU) is the primary performance bottleneck, not the CPU.
Space and Safety Math
You need an absolute minimum of 9 feet of ceiling clearance, but 10 feet is highly recommended. Anything lower triggers indoor swing syndrome, a mental block where players subconsciously decelerate their swing to avoid smashing the ceiling.
Plan for at least 10 feet of width, though 12 feet is much safer. A bad slice from a beginner will miss a narrow screen entirely, making heavy-duty side safety netting non-negotiable.
Your required room depth depends entirely on your launch monitor technology. Camera systems need less room depth than radar.
---
Complete Build Recommendation: The "Garage Workhorse"
This build balances durability and accuracy, choosing components that handle the unique garage environment without requiring a five-figure budget.
The Launch Monitor Shortlist
Your choice here dictates your space requirements.
- SkyTrak+ ($2,495 CPO): This camera and radar hybrid sits beside the ball, working in just 10 feet of total room depth. Because new units are no longer sold, you must buy a certified pre-owned (CPO) unit directly from SkyTrak. It runs E6 Connect natively and connects to GSPro via a community software connector. The 3-year cost is $3,215, including the CPO hardware and the required $19.99 monthly subscription.
- FlightScope Mevo+ ($1,999): Choose this radar unit if you have at least 16 to 18 feet of depth and want to take it to the outdoor range. It requires 8 feet behind the ball and 8 feet of ball flight, making it a bad fit for short garages. It integrates with GSPro via an API connection. The 3-year cost is $2,749, including the hardware and the $250 annual GSPro subscription.
Enclosure and Screen
Choose a freestanding enclosure kit rather than a DIY EMT frame if you occasionally need to park a car in that bay. Freestanding kits push back or disassemble much faster. Because empty garages act like giant echo chambers, ball impact is incredibly loud.
Projector
You must use a short-throw projector mounted overhead just a few feet from the screen. A standard projector sits far behind you and casts a massive shadow on the screen during your swing. Ensure the projector has at least 3,000 lumens of brightness to combat ambient light from windows.
Hitting Mat
Concrete floors are completely unforgiving on your body. If you buy a cheap, thin mat, your joints will pay the price. Buy a premium mat with a thick foam base or a replaceable hitting strip like Fiberbuilt or TrueStrike to absorb the downward impact.
---
The Hidden-Cost Garage Checklist
Do not finalize your budget without accounting for these specific garage issues:
- Climate Control: If your garage is uninsulated, budget for a 240V industrial space heater or a portable AC unit.
- Lighting Control: Standard garage lights are too bright and wash out projectors. Install dimmable fixtures or a targeted spotlight over the ball.
- Floor Protection: Lay down interlocking foam tiles under your turf to protect your clubs and absorb bounce-back from the concrete.
3. Best Golf Simulator for Home Basements and Small Rooms: The Tight-Space Blueprint
Taking a full swing in a low basement only to realize your driver is about to carve a trench through the drywall is a nightmare. In a tight spare room or basement, standard advice does not apply. Space constraints dictate every purchase when planning the best golf simulator for home use in tight quarters.
Use-Case Snapshot
- Limited Space: Basement, spare room, or bonus room.
- Short Depth: Room depth under the 15-foot radar minimum.
- Low Ceiling: Ceiling height under the comfortable 10-foot target.
- Shared Walls: Noise mitigation is a high priority.
Start Here: Choose Your Software and Measure Your Room First
Measure your room before choosing software like GSPro or E6 Connect. Room geometry rules your hardware options. Avoid the mistake of buying a radar-based unit first and trying to squeeze it into a short room; it will fail.
The Small-Room Rules
- Ceiling Height: Most players need 9 feet of clearance to swing a driver; 10 feet is comfortable. Ceilings between 8.5 and 9 feet force an irons-only compromise. Anything under 9 feet can trigger "indoor swing syndrome," a mental block where you decelerate to avoid hitting the ceiling. See our Minimum Ceiling Height for a Golf Simulator (Real Numbers) guide.
- Room Depth: Radar units require 14 to 16 feet of total depth. Camera-based, floor or overhead units are the default for tight spaces because they read the ball instantly at impact, requiring only enough room depth to prevent ball rebound.
- Left/Right Play: Moving a floor camera unit back and forth and recalibrating it for mixed-handed sessions is tedious. Overhead systems solve this friction.
---
Complete Build Recommendation A: Short-Depth, Side-Mounted
This setup keeps the launch monitor on the floor, minimizing installation hassle.
- Launch Monitor: Bushnell Launch Pro ($2,499) or a certified pre-owned (CPO) SkyTrak+ ($2,495). The Launch Pro uses the same photometric engine as the $7,000 Foresight GC3, offering tour-level accuracy. Note that SkyTrak+ units are only sold CPO direct from the manufacturer as of 2026.
- Space Requirement: Works in 10 to 12 feet of depth. You only need rear clearance for your swing and 8 feet of ball flight to the screen.
- Software Compatibility: Both support E6 Connect natively and connect to GSPro. A gaming PC is required for GSPro.
- 3-Year Total Cost: The Bushnell Launch Pro costs $3,497 (includes $2,499 hardware plus two years of the $499 annual Gold subscription, with the first year included). The SkyTrak+ costs $3,215 (covers CPO hardware plus the $19.99 monthly subscription over three years).
- Honest Tradeoffs: Floor units have small hitting zones. You must place the ball exactly on a laser dot. Offline shots can miss the camera's view, leading to misreads.
---
Complete Build Recommendation B: Overhead, Small-Room Optimized
Ceiling-mounted monitors are best for clean floor spaces and multiplayer setups.
- Launch Monitor: Uneekor EYE XO ($7,500) or EYE MINI Lite ($2,749) with ceiling mount.
- Space Advantage: Ceiling mounting removes floor clutter, opens a massive hitting zone, and allows seamless left- and right-handed play.
- Ceiling Requirement: You need 9.5 to 10 feet of ceiling height to mount the system safely and clear your clubs on the follow-through.
- Software Compatibility: Native integration with GSPro and E6 Connect. A high-end gaming PC is mandatory.
- Cost Reality: Upfront hardware costs are high, but you bypass alignment hassles, protect your hardware, and gain a seamless multiplayer experience.
Noise Mitigation: The Basement-Specific Plan
Basements act as concrete boxes that amplify sound. A golf ball hitting an impact screen at 120 mph sounds like a gunshot. Small rooms make this worse because hard surfaces are closer to the hitting mat.
To quiet your setup:
- Hang a heavy baffle net 3 to 6 inches behind your screen to deaden ball speed.
- Place memory foam panels or thick moving blankets behind the screen.
- Mount acoustic foam panels on the ceiling and walls at first reflection points.
These additions are critical if you plan to play at night while others sleep. For a step-by-step layout designed for basement dampening, read our guide on the Best Golf Simulator for a Basement (2026).
4. Best Golf Simulator for Serious Practice and High-End Builds
When building the best golf simulator for home use with a budget over $5,000, your biggest challenge is not accuracy. It is workflow. Paying premium prices only to manually align a floor unit or recalibrate whenever a left-handed golfer steps up ruins the experience.
Use-Case Snapshot
- You practice seriously, focusing on yardage gapping, face-to-path club data, and online leagues.
- You will spend for bulletproof data consistency and a permanent, frictionless room workflow.
- You want commercial-grade accuracy without the $20,000 retail markup of pre-packaged bundles.
Start Here: Software-First Setup
Your software choice dictates your PC hardware and launch monitor compatibility. Always choose software first.
If you prioritize online leagues, massive course variety, and realistic physics, build around GSPro. You will need a dedicated Windows gaming PC. For a direct comparison, check out our analysis of GSPro vs E6 Connect. If you prefer polished, licensed graphics and structured challenges, plan around the E6 Connect or Foresight FSX ecosystems.
---
Complete Build A: The Overhead Powerhouse (Best Workflow)
Ceiling-mounted hardware completely clears the floor to create a permanent, commercial-grade studio.
- Launch Monitor: Uneekor EYE XO ($7,500).
- The Workflow Advantage: Overhead high-speed cameras track ball and club data across a massive hitting zone. Left-handed and right-handed players can play together without moving any hardware or recalibrating.
- Space Requirements: You need at least 9.5 feet of ceiling height (10 feet is preferred for comfortable driver clearance), 10 to 12 feet of width, and 15 feet of total depth.
- Software Compatibility: Native integration with GSPro, E6 Connect, and Uneekor View.
- 3-Year Total Cost: $8,250. This covers the $7,500 hardware and three years of the $250 annual GSPro subscription. It excludes the gaming PC.
- Honest Tradeoffs: Complex installation. You must securely lag-bolt a heavy bracket into ceiling joists and run power and ethernet cables. It is entirely non-portable.
---
Complete Build B: The Premium Floor Unit (Tour Accuracy, Easier Setup)
If you want tour-grade data without drilling into your ceiling, choose a professional floor unit.
- Launch Monitor: Bushnell Launch Pro ($2,499) or Foresight GC3 ($7,000).
- The Shared Engine Concept: Both units share the exact same photometric, three-camera optical engine. They measure ball speed, launch, spin, and club path directly at impact. You are buying the same hardware, but the pricing structures differ.
- Space Requirements: Excellent for tight spaces. Since the camera sits adjacent to the ball, you do not need radar runway space. It requires only 10 to 12 feet of total room depth.
- The Subscription Reality: The Bushnell Launch Pro is $2,499 upfront but requires a $499 annual Gold subscription to export data to GSPro or third-party software (year one is included). The 3-year total is $3,497. The GC3 costs $7,000 upfront with no annual fees. If you plan to own the setup for over nine years, the GC3 is cheaper. Otherwise, the Bushnell is the lower upfront path.
---
The Rest of the Serious Build (Do Not Skip)
High-end launch monitors require matching room components to deliver their full value.
- The PC: GSPro and E6 Connect performance depends entirely on your GPU, not your CPU. For 1080p play, run at least an Nvidia RTX 3060 or 4060. If you want 4K projection, you need an Nvidia RTX 4070 or 4080 desktop GPU. Laptops underperform compared to desktops at the same price point.
- The Projector: Get a dedicated short-throw laser projector like the BenQ LH820ST. Look for a 0.4 to 0.6 throw ratio so you can mount it close to the screen without casting shadows. You need at least 3,000 lumens to keep the image crisp in rooms with ambient light.
- The Hitting Mat: Photometric cameras read the club head directly off the turf. Low-quality mats compress or slide, which distorts face-angle data and shocks your joints. Stick to commercial-grade options like Fiberbuilt or TrueStrike to ensure consistent data and prevent injury. Read our review of the Best Hitting Mats for a Golf Simulator.
5. Best Budget Builds: Building the Best Golf Simulator for Home Under $1,000 and $3,500
The quickest way to blow a home golf simulator budget is to spend everything on the launch monitor, leaving nothing for a safe enclosure, a joint-saving mat, or simulation software. If you have a hard ceiling on spend, you must budget for the entire system. Your goal is real practice value, not a frustrating novelty that sits unused because a cheap mat hurts your elbows or your net leaks balls into the drywall.
Start Here: Software-First and Budget-First
Your software choice rules your budget because it dictates your hardware requirements. GSPro requires a dedicated gaming PC, adding significant upfront cost. Native app-based systems like Awesome Golf or Garmin Golf run on an iPad, removing the PC bottleneck entirely.
Once you choose your software, decide on the physical framework. A net setup is the easiest way to start building the best golf simulator for home under $1,000. For a full impact screen and projector, budget between $2,500 and $3,500.
Budget Tier Mini-Framework
- Under $1,000: Budget only for a launch monitor, heavy-duty net, and high-quality mat. A full projector and screen setup is not realistic here.
- $1,000 to $3,500: An entry-level full screen setup is achievable. You must build your own frame and accept hardware compromises, like buying certified pre-owned (CPO) units.
For complete package details, see our guide to the Best Budget Golf Simulator Setups (Under $1,000 / Under $3,000).
Complete Build Recommendation A: Under $1,000 (Net-First)
This setup prioritizes ball tracking and joint safety over visual projection. You view shots on an iPad or cast to a nearby television.
- Launch Monitor: Choose the Garmin Approach R10 ($599) or Rapsodo MLM2PRO ($699).
- Space Requirements: Both are radar-based and space-hungry. You need 14 to 16 feet of total room depth: 6 to 8 feet behind the ball for the unit, plus 8 feet of ball flight. They will not work in tight basement spaces.
- Total Cost: The Garmin R10 costs $896 over three years (hardware plus the $99 annual subscription). The MLM2PRO costs $897 over three years (hardware, two years of the $99 subscription with year one free, and $99 for specialized RPT balls).
- Honest Tradeoffs: The Garmin R10 estimates spin rather than measuring it, causing erratic indoor reads. The MLM2PRO measures spin but has a known community-wide weakness with driver accuracy. It also requires marked RPT balls for full data.
- Safety Net: Buy a commercial-grade baffle net with side safety netting to catch shanked shots.
- Hitting Mat: Do not buy a cheap, thin mat. Allocate at least $200 for a mat with a thick foam base to prevent wrist and joint injuries.
Complete Build Recommendation B: $2,500 to $3,500 (Small-Room Friendly Full Sim)
To get visual realism on an impact screen in under 15 feet of depth, you need a camera-based system.
- Launch Monitor: SkyTrak+ ($2,495 CPO). New units are no longer available direct, so you must buy certified pre-owned (CPO). Because it sits beside the ball, it requires only 10 to 12 feet of total depth. It integrates natively with E6 Connect, works with GSPro via a community software connector, and costs $19.99 per month for full simulation.
- Screen and Enclosure: Build a frame using 1-inch EMT pipes and a raw impact screen. This DIY approach saves up to $1,000 over pre-built kits.
- Projector: You need a short-throw projector with a 0.5 throw ratio. If your screen is 10 feet wide, the lens must sit exactly 5 feet away. This math keeps the projector in front of your swing path so you do not cast shadows.
- PC vs. Mobile Path: Running GSPro requires a dedicated gaming PC. If budget is tight, run E6 Connect on an iPad instead to avoid the extra $800 PC cost.
The No-Waste Upgrade Path
If you cannot afford your dream system today, build it in stages. This routing prevents dead-end purchases:
- Stage 1 (Practice): Buy a premium hitting mat, a heavy-duty net, and a budget launch monitor (R10 or MLM2PRO).
- Stage 2 (Enclosure): Replace the net with a DIY EMT frame and an impact screen.
- Stage 3 (Projection): Add a short-throw projector and a gaming PC to run GSPro.
- Stage 4 (Monitor Upgrade): Swap your launch monitor for a camera-based unit once your space and software preferences are locked.
How to Choose the Best Golf Simulator for Home Setups: Step-by-Step Guide
Before spending thousands of dollars on hardware, you need a clear framework to filter your options. Use this direct decision tree to find your starting point.
2-Minute Decision Tree
- Q1: What is your primary simulation software goal?
- GSPro: You need a dedicated gaming PC. Confirm your launch monitor choice supports it.
- E6 Connect or FSX: These offer iOS options but require high annual subscription fees.
- Native app-only: This is the easiest, lowest-cost route, but it limits your course play and game depth.
- Q2: What is your room depth from tee to screen?
- Under 14 feet: You must use camera-based or overhead units. Radar cannot track ball flight in short rooms. Floor-mounted camera systems like the Bushnell Launch Pro or SkyTrak+ are your default choices.
- 14 feet or more: Radar systems like the Garmin R10, Rapsodo MLM2PRO, or FlightScope Mevo+ remain viable options.
- Q3: What is your ceiling height and who will swing driver?
- Under 9 feet: You are limited to an irons-only setup. Tall players or those with fast, aggressive swings will hit the ceiling, which triggers indoor swing syndrome. You need a minimum of 10 feet of height for comfortable driver swings.
- Q4: Do you need lefty and righty play in the same session?
- Yes: Floor-mounted side units are frustrating for mixed-handed groups because you must move and recalibrate the unit for every turn. An overhead system like the Uneekor EYE XO is the only friction-free solution.
- Q5: What is your realistic all-in budget?
- Under $1,500: Focus on a net, a premium hitting mat, and a mobile-friendly monitor. Avoid cheap mats to protect your joints.
- Over $3,500: You can build a permanent setup with an impact screen, a short-throw projector, and a high-accuracy camera unit.
Master Comparison Table
This table compares the top launch monitors using real-world numbers. All prices and subscription details reflect 2026 market realities.
| Launch Monitor | Sensor Type | Indoor Space Depth | Subscription Reality (3-Year Total Formula) | GSPro Support | E6 Support | Best For | Biggest Downside |
|---|---|---|---|---|---|---|---|
| Garmin R10 ($599) | Radar | 14 to 16 ft | $99/yr ($599 + $297 = $896) | Connector (API) | Native | Budget entry setups | Estimates spin; struggles in tight indoor spaces |
| Rapsodo MLM2PRO ($699) | Camera & Radar | 15 ft min | $99/yr, Yr 1 free + $80 RPT balls ($977) | Connector (API) | Native | Iron practice under $1,000 | Inconsistent driver accuracy; requires RPT balls |
| FlightScope Mevo+ ($1,999) | Radar | 16 to 18 ft | $250/yr GSPro ($1,999 + $750 = $2,749) | Connector (API) | Native | Outdoor range and long rooms | Demands huge room depth |
| SkyTrak+ ($2,495 CPO) | Camera & Radar | 10 to 12 ft | $19.99/mo ($2,495 + $720 = $3,215) | Connector | Native | Small rooms on a mid-range budget | Certified pre-owned is the only buying path |
| Bushnell Launch Pro ($2,499) | Camera (GC3 Engine) | 10 to 12 ft | $499/yr Gold, Yr 1 free ($2,499 + $998 = $3,497) | Connector | Native | Indoor accuracy under $3,000 | High annual fees to export data |
| Garmin Approach R50 ($5,000) | 3-Camera | 10 to 12 ft | $99/yr Home Tee Hero ($5,000 + $297 = $5,297) | Not supported | Native | Plug-and-play without a PC | No GSPro support; club data requires stickers |
| Uneekor EYE XO ($7,500) | Overhead Camera | 15 ft | $250/yr GSPro ($7,500 + $750 = $8,250) | Native | Native | Frictionless multiplayer | High price; non-portable installation |
| Uneekor EYE MINI Lite ($2,749) | Floor Camera | 10 to 12 ft | $250/yr GSPro ($2,749 + $750 = $3,499) | Native | Native | Floor-mounted native GSPro | Must remain PC-tethered; non-portable |
The 3 Biggest Simulator Mistakes
- Buying hardware before software: You will end up with a monitor that does not run the platform you want. Always pick your software first, then match your hardware to it.
- Choosing radar when your room is short: Radar units need a physical runway to track the ball. Trying to use radar in a room under 15 feet leads to missed reads and immense frustration.
- Budgeting only for the monitor: A functional simulator requires a high-quality hitting mat, a gaming PC or iPad, software subscriptions, and safety nets or enclosures. Hardware price is only part of the equation.
BuildAGolfSim.com Directory: Plan Your Build
Use our dedicated handbooks and guides to map out your home simulator build:
- Use-Case Handbooks:
- Beginner Golf Simulator Guide
- Garage Golf Simulator Guide
- Basement Golf Simulator Guide
- Serious Golfers Simulator Guide
- Budget Golf Simulator Guide
- Component Guides:
- Launch Monitor Subscription Cost Table
- DIY EMT Enclosure Guide
- Projector Throw Ratio Guide
- Best Hitting Mats Guide
- Recommended PCs for GSPro
- Technical Reference:
- What Launch Monitors Work with GSPro
- GSPro PC Requirements
- Minimum Ceiling Height Guide
- Camera vs Radar Indoors Guide
- Noise Mitigation Playbook
Frequently Asked Questions
What minimum ceiling height do I need to swing a driver?
You need an absolute minimum ceiling height of 9 feet to swing a driver, but 10 feet is the practical target for a comfortable swing. Anything lower triggers indoor swing syndrome, a mental block where you decelerate your club to protect your drywall. Before buying any hardware, tape a piece of cardboard to your ceiling and take slow test swings with your longest club to ensure you have true clearance.
How much room depth do I need for a home golf simulator?
You need 10 to 12 feet of room depth for a camera-based simulator, but a radar-based system requires 15 to 18 feet of depth. Camera systems sit beside the ball and read data instantly at impact, meaning you only need enough room to clear your backswing. Radar systems sit behind the player and require a long physical runway to track the ball flight.
Do I need a gaming PC for a home simulator?
Yes, you need a dedicated Windows gaming PC if you plan to run GSPro or high-end projector software. Focus your budget on the graphics card rather than the CPU or RAM. Running in 4K resolution is significantly harder on hardware than 1080p, requiring at least an Nvidia RTX 4070 desktop GPU rather than an entry-level RTX 3060.
What is the real 3-year cost of a home golf simulator?
The real 3-year cost of a home simulator ranges from $1,000 for a mobile net setup to over $8,000 for a dedicated enclosure build. Buyers often budget only for the launch monitor, forgetting that the true cost includes annual software subscriptions, the PC, short-throw projector, impact screen, and a joint-saving mat. For example, a $699 Rapsodo MLM2PRO costs $977 over three years when factoring in subscriptions and specialized balls.
Which launch monitors work with GSPro and E6 Connect?
Most major launch monitors work with GSPro and E6 Connect, but their compatibility is either native or through an API connector. Units like the Uneekor EYE XO offer native integrations. Monitors like the Garmin R10 and Rapsodo MLM2PRO require community-built software connectors, which can add setup friction and may require additional paid subscription tiers to export data.
How loud is a home golf simulator and how do I make it quieter?
A home golf simulator is incredibly loud, often exceeding 90 decibels when a driver impact occurs. To make your setup quieter, hang a heavy baffle net a few inches behind your screen to deaden the ball speed. You can also place memory foam panels behind the screen and add acoustic foam tiles to your walls to absorb the echo.
Scroll back up to use our 2-Minute Decision Tree and use-case sections to find your perfect setup.
Related Guides
Square Golf Omni Setup Guide (2026): First Run and GSPro Connection
Master your Square Golf Omni setup with our step-by-step guide. Learn exact Ready Zone dimensions, app calibration, and how to connect to GSPro cleanly.
How to Build a Golf Simulator in Your Garage: Step-by-Step (2026)
Learn how to build a golf simulator in your garage with this step-by-step 2026 guide. Get exact clearance dimensions, costs, and projector setup tips.
Golf Simulator for Small Rooms: Best Setups Under 12 Feet Deep
Need a golf simulator small room setup? Discover the best camera-based and overhead builds under 12 feet deep with real placement math, costs, and gear.