
Golf Simulator Room Size & Ceiling Height: Complete 2025 Guide

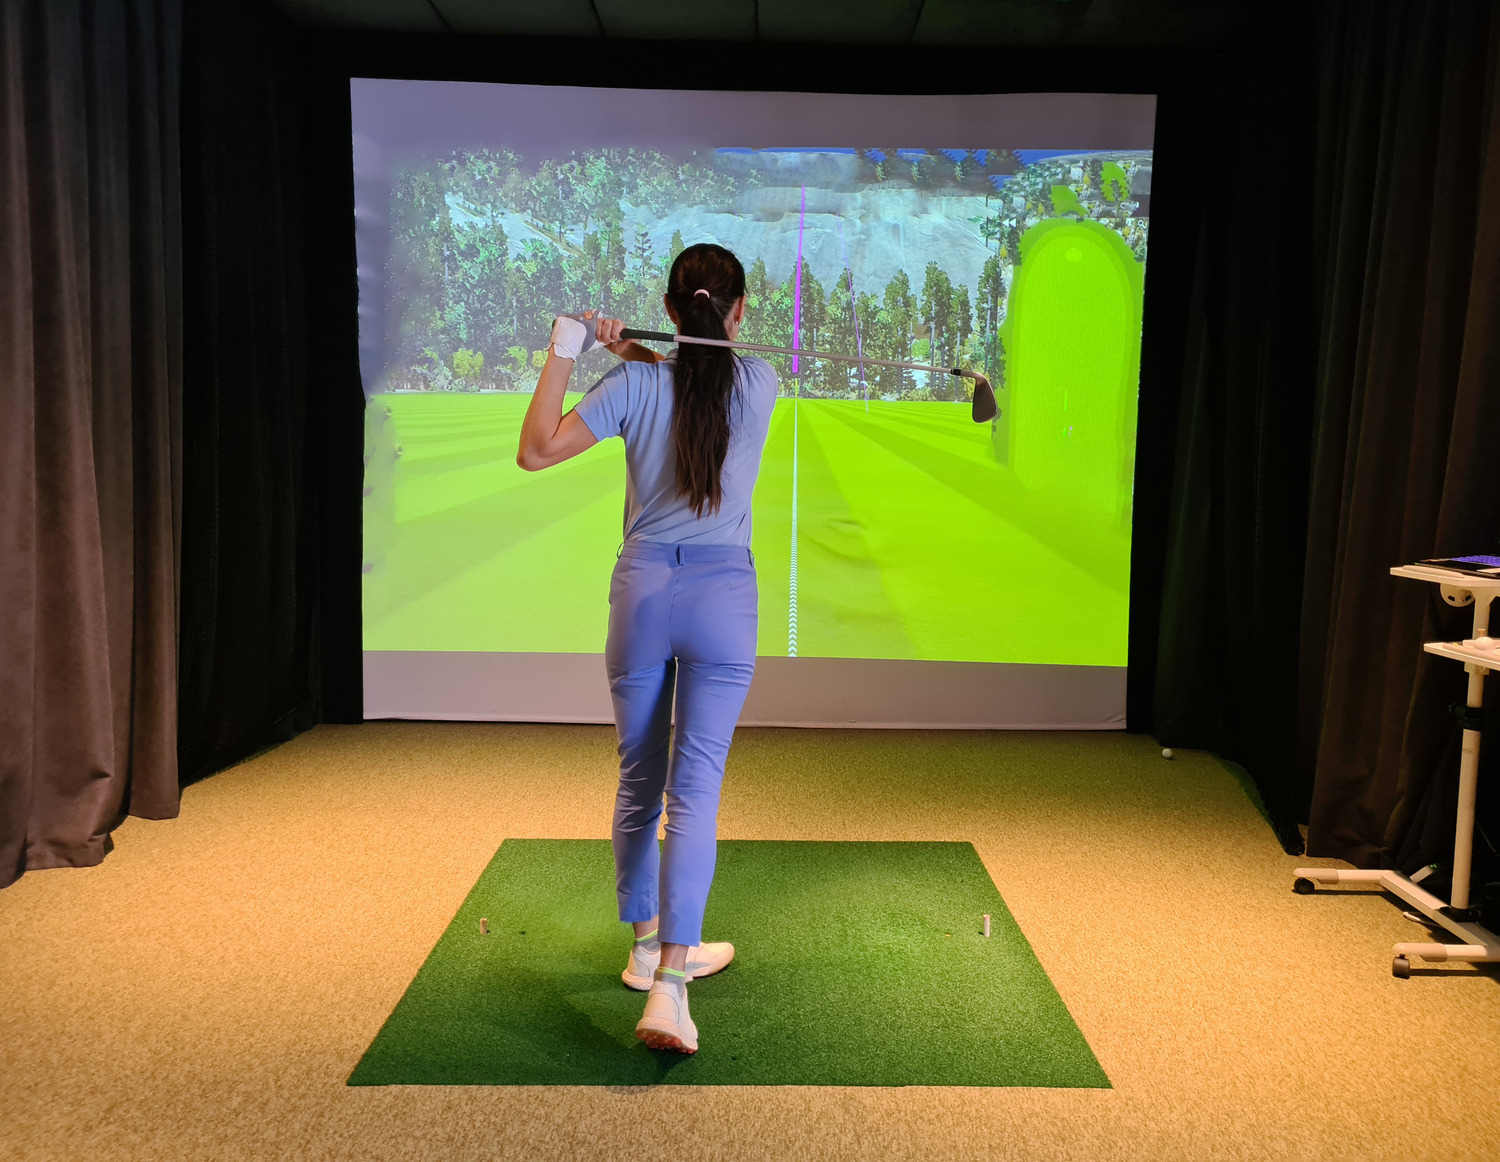
Golf Simulator Room Size & Ceiling Height: The Complete Guide
Planning a home golf simulator setup? Look, we've helped hundreds of golfers figure out their sim rooms, and the biggest mistake we see? Not measuring properly before dropping serious cash on gear. Getting your golf simulator room dimensions right is the single most important factor for a successful installation.
Whether you're converting a garage, basement, or spare bedroom into your personal hitting bay, understanding the space requirements for golf simulators will save you thousands in potential mistakes and ensure you can take full swings without worrying about clubbing the ceiling.
Quick Reference: Minimum Golf Simulator Room Dimensions
Before we dive in, here are the numbers you need to know:
| Dimension | Minimum | Recommended | Sweet Spot |
|---|---|---|---|
| Ceiling Height | 9 ft | 10 ft | 10+ ft |
| Room Width | 10 ft | 12 ft | 15+ ft |
| Room Depth | 12 ft | 16 ft | 18+ ft |
Fair warning though, these are bare minimums. If you're on the taller side or like to really let it rip with the driver, you'll want more headroom.
Why Ceiling Height Matters Most
The golf simulator ceiling height is often the make-or-break factor in home setups. Ever seen a guy smash his driver into a ceiling fan? Not pretty. Here's what you need to know.
The Science of Swing Clearance
When you rip a driver, the club head travels in an arc that extends well above your head at the top of your backswing. For most golfers:
Average golfer (5'10"): Club reaches approximately 8'6" at the top of backswing
Tall golfer (6'2"+): Club can reach 9'0" or higher
Safety buffer needed: Minimum 6 to 12 inches above the highest point of your swing
Ceiling Height by Golfer Height
| Your Height | Minimum Ceiling | Recommended |
|---|---|---|
| 5'6" or under | 8'6" | 9'0" |
| 5'7" to 5'11" | 9'0" | 9'6" |
| 6'0" to 6'3" | 9'6" | 10'0" |
| 6'4" and over | 10'0" | 10'6"+ |
Here's what the veterans do: grab a club with a headcover on it, stand in your space, and take a few easy swings. If you're brushing ceiling, you've got a problem.
Room Depth: Understanding the Full Setup
Golf simulator depth requirements extend beyond just having room to swing. You need space for your launch monitor, the screen, and room to set up without feeling cramped.
Space Behind the Golfer
You need approximately 3 to 4 feet behind your hitting position for a natural stance and weight shift, launch monitor placement if you're using rear-facing units like Garmin R10 or Mevo+, and enough room to feel comfortable without being jammed against the back wall.
Space in Front (Ball to Screen)
The distance from your hitting position to the screen depends on your launch monitor type:
Overhead or Camera-based monitors (SkyTrak, Uneekor): Minimum 10 to 12 feet from ball to screen, with 12 to 14 feet being the sweet spot.
Radar-based monitors (Trackman, FlightScope): These can work with as little as 8 to 10 feet from ball to screen, though 10 to 12 feet is ideal.
Total Depth Calculation
Here's how to calculate your required room depth: Buffer Behind (3 to 4 ft) + Hitting Position + Ball to Screen Distance + Screen/Enclosure Depth (1 to 2 ft)
For a typical setup you're looking at 3 ft behind the golfer, 2 ft for golfer position, 12 ft from ball to screen, and 1 ft for screen depth. That's 18 ft total for an ideal depth.
Room Width Requirements
Golf simulator width needs to accommodate your full swing arc plus safety margins so you're not clipping walls or furniture.
Minimum Width Breakdown
Your swing arc with a driver spans about 6 feet at its widest. Add a 2 foot safety buffer on each side plus 6 to 12 inches per side for the enclosure frame. Result: 10 feet absolute minimum, 12 to 15 feet recommended.
Width Considerations for Different Clubs
Driver swings are the widest and need max clearance. Irons require slightly less room but you still want that buffer. Even putting practice needs room for comfortable stance and stroke.
Best Spaces for Golf Simulators
Not all rooms are created equal when it comes to golf sims. Here's how the most common spaces stack up.
Garage Conversions
Garages are honestly the sweet spot for most home golf simulators. You're typically looking at 9 to 10 foot ceilings, plenty of depth and width to work with, concrete floors which are great for stability, and easy cleanup. Just watch out for overhead garage door tracks, water heaters and HVAC equipment, and potential temperature swings if the garage isn't climate controlled.
Basement Installations
Basements can work great but often face ceiling height challenges. Tips for basement setups include measuring carefully around ductwork and pipes (these eat up headroom fast), considering a designated hitting area where ceiling is highest, and adding proper flooring protection.
Spare Bedrooms and Bonus Rooms
These spaces often have standard 8 foot ceilings which is tight but workable for shorter golfers. You'll probably want to stick to irons and hybrids, consider a hitting net setup rather than full enclosure, and make sure floor can support the equipment weight.
Critical Measurements to Take
Before you buy anything, measure twice and cut once. Here's your checklist.
Height Measurements
Measure at multiple points since floors and ceilings aren't always level. Check for anything that hangs down like lights, fans, ductwork, and beams. Account for any flooring you'll add since turf and mats add height.
Width Measurements
Measure at the narrowest point in the room. Account for any obstructions like outlets, thermostats, and windows. Leave access room around the simulator for maintenance.
Depth Measurements
Measure the full usable length of space. Account for doors that swing into the room. Consider where you'll store equipment when not in use.
Making the Most of Limited Space
Got a room that's a bit tight? Here are some real-world solutions that work.
Low Ceiling Solutions
If you're dealing with less-than-ideal ceiling height, consider taking a modified swing with a 3/4 backswing. Use shorter clubs like 7-iron through wedges for practice. Install impact screens that work with compact enclosures.
Narrow Room Tricks
For tight width situations, position the hitting area at the widest point of the room. Choose a narrower enclosure design. Use wall-mounted monitors to save floor space.
Shallow Room Workarounds
When depth is limited, consider ceiling-mounted or overhead launch monitors as they need less space. Use a shorter throw projector or large TV instead of projector. Mount the screen closer and use software adjustments.
Equipment Spacing Guidelines
Proper spacing between components ensures optimal performance and safety.
Launch Monitor Placement
This varies by monitor type. Overhead units like Uneekor EYE XO2 mount 9 to 10 feet high, directly above the hitting area. Rear-facing units like Garmin R10 sit 6 to 8 feet behind the ball, on the floor. Side units like SkyTrak Plus are positioned at an angle, roughly 2 feet to the side.
Projector Positioning
Projector placement depends on throw ratio. Short throw projectors mount 4 to 6 feet from screen while standard throw projectors need 10 to 14 feet. Ceiling mounting is almost always better than floor or table mounting.
Screen and Enclosure Buffer
Leave 2 to 3 inches between the impact screen and your back wall. Ensure enclosure frame has at least 1 inch clearance from ceiling. Side clearance of 6 inches minimum from walls protects both the enclosure and your drywall.
Common Room Setup Mistakes to Avoid
We see these mistakes all the time, so learn from others' experience.
Underestimating Ceiling Needs
The number one mistake is assuming your 8 foot ceiling will work. It might for putting practice but that's about it for most golfers. Always test with actual swings before committing to a space.
Forgetting About Doors and Windows
That door behind you? It swings into your hitting area. Those windows? They need protection or they'll eventually meet a shank. Plan around fixed elements before setting up.
Ignoring Climate Control
Simulators generate heat. You generate heat when swinging. A poorly ventilated space becomes uncomfortable fast. Add a fan or upgrade your HVAC before you start sweating through every session.
Professional vs. DIY Installation
Quick reality check on installation approaches.
DIY-Friendly Setups
If your room already meets minimum dimensions and you're handy, a DIY setup can save thousands. Most enclosures and screens come with instructions. Launch monitors are plug and play. Projectors just need proper mounting.
When to Call the Pros
Consider professional help if you need structural modifications like raising ceiling, want electrical work done for dedicated circuits, or aren't comfortable with ceiling mounting heavy equipment.
Final Thoughts
Getting your golf simulator room size right from the start saves headaches and money down the road. Measure carefully, plan for your worst-case scenario with that big driver swing, and don't forget the little details like door clearances and HVAC.
The perfect sim room might not exist, but with proper planning, you can build something that lets you practice year-round without worrying about space constraints. And really, that's what it's all about: being able to work on your game whenever you want, in the comfort of your own home.
Ready to start planning your build? Check out our golf simulator builder tool to see what components fit your space and budget.
Related Guides
Square Golf Omni Setup Guide (2026): First Run and GSPro Connection
Master your Square Golf Omni setup with our step-by-step guide. Learn exact Ready Zone dimensions, app calibration, and how to connect to GSPro cleanly.
How to Build a Golf Simulator in Your Garage: Step-by-Step (2026)
Learn how to build a golf simulator in your garage with this step-by-step 2026 guide. Get exact clearance dimensions, costs, and projector setup tips.
Golf Simulator for Small Rooms: Best Setups Under 12 Feet Deep
Need a golf simulator small room setup? Discover the best camera-based and overhead builds under 12 feet deep with real placement math, costs, and gear.