Square Golf Omni Setup Guide (2026): First Run and GSPro Connection

Square Golf Omni Setup Guide (2026)
If you just unboxed your unit for indoor or outdoor practice, this Square Golf Omni setup gets you hitting shots in GSPro without launch-day headaches. When a new monitor connects but fails to register shots, the culprit is almost always unit placement, license type, or Bluetooth distance.
Here is how to dial in the exact Ready Zone, clear firmware updates, and verify ball data before finishing your GSPro setup. Start by confirming your software path.
Step 1: Decide on Your Software Path and Check PC Readiness
Your entire Square Golf Omni setup changes depending on whether you run the Square Golf app on a mobile device or link the unit to GSPro. The Omni functions as a standalone, subscription-free launch monitor out of the box using an iPad or phone. Moving to GSPro delivers a full simulator bay experience, but it introduces PC hardware demands and recurring fees that catch builders off guard.
Decide which path you are taking today:
- Option A: Square Golf app only. Download the free app to an iOS or Android device. This is the fastest route to get swinging, run practice sessions, and verify that the unit measures ball flight cleanly.
- Option B: GSPro on Windows. This route uses the official Square connector workflow to send shot data to GSPro. It gives you 4K course play and online competition, but it requires a dedicated gaming PC and an active software license.
The Real Cost of Running GSPro
The Omni carries no mandatory subscription, making it one of the most accessible camera units available. Choosing GSPro, however, changes the math. GSPro costs $250 per year, which adds up to $750 over three years on software alone.
GSPro also demands a Windows PC with a dedicated graphics card (GPU). Mac systems and office laptops will not handle the graphical load. If you do not own a gaming PC, add $800 to $1,200 to your budget for a capable desktop before buying any mounts or screens. Check our breakdown of golf simulator PC requirements to confirm your hardware qualifies.
GSPro PC Checklist
If you choose Option B, confirm your hardware meets these benchmarks before unboxing accessories:
- Operating System: Windows 10 or Windows 11 (64-bit).
- GPU Power: Minimum NVIDIA GeForce RTX 3060 for 1080p, or an RTX 4070 for 4K simulation.
- Bluetooth: Bluetooth 4.0 or higher to communicate with the Omni. If your desktop motherboard lacks Bluetooth, pick up a USB Bluetooth 5.0 adapter.
- Physical PC Placement: Position the tower outside the ball ricochet zone, but within 10 to 15 feet of the hitting mat to prevent signal drops.
What a Correct Result Looks Like
You have picked your platform, confirmed your hardware specs, and identified which device will host the initial connection.
Common mistake to avoid: Do not configure GSPro or map your projector before testing the Omni in the native Square Golf app. Always verify the launch monitor reads a simple 7-iron on a tablet first. If you run into connection drops later, you will know immediately whether the issue sits with the Omni hardware or the PC connector bridge.
Step 2: Position the Launch Monitor and Dial in the Ready Zone
With a photometric launch monitor like the Square Golf Omni, physical placement dictates your tracking accuracy. Radar units require massive room depth, but camera systems live and die by angles, leveling, and lighting. If the unit is offset by two inches or sitting tilted on thick turf, you will see ghost swings, failed ball locks, or missing club numbers even with a perfect Bluetooth connection. Dialing in your physical positioning is the most critical step of your Square Golf Omni setup.
Dial in the Exact Ready Zone Dimensions
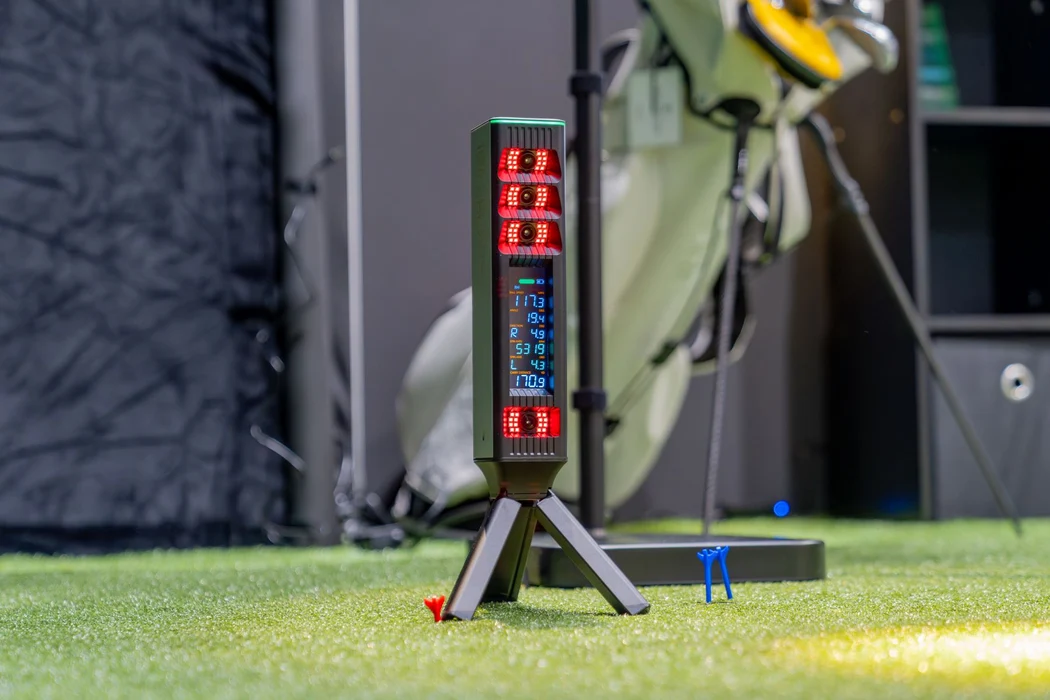
Set the Omni on the ground parallel to your target line. For a right-handed golfer, place the unit to the right of your hitting mat (mirror everything for left-handed golfers). The Omni manual specifies strict boundaries for tracking impact:
- Front Offset: The hitting area begins 35 cm (14 inches) forward from the device along the target line.
- Lateral Offset: The hitting area starts 5 cm (2 inches) to the right of the unit front face.
- Ready Zone Size: The capture window measures 25 cm by 25 cm (10 inches by 10 inches).
- Clubhead Tracking: Place your ball in the front portion of this 10-inch box. Placing the ball toward the back edge blocks the cameras from capturing the clubface path prior to impact.
Leveling and Mat Height
Keep the base of the Omni level with your hitting turf. If your hitting mat sits two inches high, do not leave the Omni resting on the bare floor below. An unlevel unit angles the optical sensors upward, shrinking the effective Ready Zone and distorting launch angles. Build a small leveling stand or use dense foam scrap to bring the monitor completely flush with your mat surface.
Indoor Bay Geometry
Because the Omni sits beside the ball, you avoid the 14 to 16 feet of depth that radar units require. A workable indoor bay needs:
- Tee-to-Screen Distance: 8 to 10 feet for bounce-back safety.
- Stance Clearance: 5 feet of clear space behind the ball for your stance and backswing.
- Total Depth: 13 to 15 feet total.
For complete swing clearance, wall buffers, and ceiling height math based on your player height, check our golf simulator room size guide.
Outdoor Setup Adjustments
The Omni runs on an internal rechargeable battery for range practice, but optical units face unique outdoor challenges:
- Sun Glare: Never point the Omni camera lenses directly into the rising or setting sun, which blinds the optical sensors. Keep the sun behind the unit or hit under cover.
- Moisture Limits: The Omni is not waterproof and carries no weatherized IP rating. Keep it off wet morning grass and pack it up if rain starts.
- Turf Stability: Place the monitor on flat, hard-packed turf so it does not settle or tilt between shots.
What a Correct Result Looks Like
Set a ball inside the front half of the 10-inch square. The status LED switches to solid green, confirming the optical cameras have locked onto the ball and armed the trigger.
Common mistake to avoid: Placing the ball in the back half of the Ready Zone and assuming your clubhead stickers failed when club path drops out. If you get ball data but no club metrics, move the ball two inches forward in the box before changing any hardware settings.
Step 3: Run the Native App Baseline, Align the Unit, and Apply Club Stickers
Never jump straight into GSPro before you confirm the Omni reads shots cleanly in the native Square Golf app. Introducing PC bridges, firewall permissions, and third-party graphics before verifying the hardware turns troubleshooting into a guessing game. Lock in your baseline on a phone or tablet first to complete this part of your Square Golf Omni setup.
The First-Run Setup Checklist
Work through this sequence before hitting your first test ball:
- Charge the battery: Fully charge the unit before testing. Outdoor range sessions typically yield 3 to 4 hours of continuous runtime. For indoor simulator bays, keep the USB-C cable plugged into a dedicated power brick.
- Wait 30 seconds for wireless boot: Power the Omni on, but do not search for it immediately. The manual notes that the unit requires roughly 30 seconds after powering on to complete wireless initialization. Searching too early causes pairing errors. Once the status LED stabilizes, open the Square Golf app and pair via Bluetooth.
- Run alignment calibration: Lay the included alignment stick flat on your hitting mat inside the Ready Zone along your target line. Open the alignment utility in the app and confirm the internal cameras match your physical target line. An offset of just two degrees turns a straight strike into an artificial push or pull on screen.
- Apply clubface and shaft stickers: Place the clubface marker along the top edge of your test iron, then wrap the reflective sticker around the shaft just above the hosel. Without these stickers, the Omni still tracks full ball data, but you lose all club delivery metrics, including club path, face-to-path, and attack angle.
- Hit five baseline shots: Place a standard white ball in the Ready Zone with a 7-iron. Hit five shots to verify consistent ball lock, ball speed, and carry direction against your normal numbers.
Indoor vs. Outdoor Lighting and Ball Selection
Optical launch monitors rely on high-contrast image capture rather than radar waves:
- Indoors: Use clean, standard white balls for baseline testing. Yellow covers, scuffed range balls, and high-contrast logos can interfere with spin measurements.
- Outdoors: Keep low-angle direct sunlight out of the camera lenses. If the sun sits directly in front of the unit, adjust your hitting orientation so the lenses remain shaded.
What a Correct Result Looks Like
A proper baseline gives you a repeatable ball lock within two seconds of placing the ball, turning the status LED solid. Shots register immediately in the app with realistic carry numbers and no unexplained missed reads.
Common Mistakes to Avoid
- Pairing to multiple hosts at once: Never leave the Omni paired to your phone if you plan to connect to a PC next. Simultaneous host pairing causes connection drops. Always toggle Bluetooth off on your phone before opening PC connectors.
- Leaving reflective aids in the Ready Zone: Remove the alignment stick, extra tees, and sticker backing sheets from the turf before swinging. Shiny objects or smudged lenses inside the camera view cause immediate shot-detection failures.
Step 4: Connect to GSPro and Verify Shot Tracking
Running GSPro is the ultimate goal of many Square Golf Omni setups, but it is also where first-day builds run into trouble. A green status light does not guarantee shots will register on screen if your connector bridge closes or your software license mismatches. Establishing your connection cleanly prevents the dreaded connected-with-no-shots loop.
Pre-Connection Checklist
Confirm three tactical requirements before opening your software:
- GSPro Subscription: Maintain an active GSPro subscription ($250 per year). If you need to purchase or renew, review our guide on how to set up GSPro.
- Operating System: Confirm your PC runs 64-bit Windows 10 or Windows 11. The SQG GSPro Connect bridge application does not support macOS.
- Bluetooth Signal: Optical tracking packets require an uninterrupted radio link. If your PC sits more than 10 feet away or hides behind a metal enclosure, plug a USB Bluetooth dongle into a short extension cable positioned beside your hitting bay.
Step-by-Step Connection Sequence
Follow this order precisely to establish the API bridge:
- Update GSPro: Open the GSPro launcher and verify you are running the latest software build before launching the game.
- Open GSPro Connect: Launch the GSPro connection window. When prompted for license type, choose OpenAPI. The Omni communicates through GSPro open interface rather than legacy integrations. If you converted from another launch monitor, clear your saved connector settings to prevent profile conflicts.
- Launch SQG GSPro Connect: Open the official Square connector application. Connect to the Omni launch monitor first via Bluetooth. Once paired, click the button to connect to GSPro.
- Keep the Bridge Active: Minimize the SQG GSPro Connect window. Do not close or exit the app, or your shot data pipeline will sever instantly.
Verification Protocol
When the connection succeeds, both the SQG bridge and GSPro display green ready indicators. Place a ball in the front half of the hitting zone and hit three easy 8-iron shots. Confirm that GSPro receives ball speed, launch angle, and spin numbers within two seconds of impact without freezing on the trigger screen.
Troubleshooting Known Bridge Errors
- Connected but no shots register: Verify the ball sits in the front five inches of the 10-inch box. Ensure the SQG bridge window is running in the taskbar, check that you selected OpenAPI, and remove white tees or shiny club covers near the hitting area.
- Bluetooth drops mid-round: Turn off Bluetooth on your phone or tablet to stop the Omni from background pairing with mobile. Keep your PC close or use a dedicated USB Bluetooth dongle.
- Left-handed detection failures: Certain firmware builds have had left-handed tracking glitches in third-party connectors. Update the Omni firmware through the mobile app, confirm shots track properly in the native Square software, and then retest GSPro.
The Baseline Checklist and Next Steps
You now have everything needed to complete your Square Golf Omni setup: placing the unit level with the mat, confirming clean reads in the native app, and locking in a stable GSPro connection. When misreads crop up, it is almost never bad tracking hardware. Most GSPro connection issues boil down to ball placement, selecting the wrong license profile, or Bluetooth dropouts between the monitor and your gaming PC.
Keep this six-point baseline checklist handy before you start your next round:
- Ball sitting in the front half of the 10-inch Ready Zone.
- SQG GSPro Connect bridge actively running in the background.
- Bluetooth dongle positioned within 10 to 15 feet of the hitting mat.
- OpenAPI selected as your active license profile in the connection window.
- Direct low-angle sunlight shielded from the optical camera lenses.
- Phone Bluetooth toggled off to avoid dual-pairing drops.
For a deeper look at optical accuracy, battery life, and hardware tradeoffs, read our complete Square Golf Omni review. Before you tweak advanced settings, third-party offsets, or community USB tools, run a clean 20-shot session indoors and outdoors to confirm your carry numbers. Once that baseline holds steady, your bay is officially dialed in and ready for course play.
Frequently Asked Questions
What are the exact Square Golf Omni ball placement measurements?
The Square Golf Omni Ready Zone starts 14 inches (35 cm) forward along the target line and 2 inches (5 cm) to the right of the unit, creating a 10-by-10-inch (25 by 25 cm) hitting window. Always position your ball in the front half of this 10-inch box. Placing the ball toward the back edge blocks the optical cameras from tracking the clubhead before impact, which drops your club path and face angle data.
Do I need special balls to use the Square Golf Omni?
No, the Square Golf Omni tracks standard, unmarked white golf balls both indoors and outdoors without special dots or reflective patterns. However, avoid matte finish, dark-colored, or heavily scuffed golf balls. The high-speed optical cameras rely on sharp contrast to detect ball edges and measure dimple rotation. Dark or busy geometric patterns confuse the optical sensors and cause missed reads or inaccurate spin figures.
Do I have to buy GSPro to use the Square Golf Omni, and what does it cost?
No, the native Square Golf app is subscription-free for basic practice, but running GSPro costs $250 per year. Over three years, simulation software adds $750 to your total build cost. You will also need a dedicated Windows PC with at least an NVIDIA RTX 3060 graphics card to run the course graphics smoothly, which adds $800 to $1,200 if you do not already own one.
Why does GSPro show connected but won't register shots from my Omni?
A green connection status without shot registration usually means your ball is sitting too far back in the hitting zone or the background bridge disconnected. Ensure your ball rests in the front five inches of the 10-inch Ready Zone. Next, verify you selected OpenAPI in the GSPro window, confirm the SQG GSPro Connect app is minimized rather than closed, and keep your PC within 10 feet to eliminate Bluetooth packet loss.
Can I use the Square Golf Omni outdoors in direct sunlight?
Yes, you can run the Omni outdoors, but you must prevent low-angle sunlight from shining directly into the camera lenses. Direct sun glare overexposes the optical sensors, which causes failed ball triggers and lost shots. Orient your hitting station so the sun sits behind or directly above the launch monitor, or place the unit under a shade canopy to keep tracking consistent.
Related Guides
How to Build a Golf Simulator in Your Garage: Step-by-Step (2026)
Learn how to build a golf simulator in your garage with this step-by-step 2026 guide. Get exact clearance dimensions, costs, and projector setup tips.
Golf Simulator for Small Rooms: Best Setups Under 12 Feet Deep
Need a golf simulator small room setup? Discover the best camera-based and overhead builds under 12 feet deep with real placement math, costs, and gear.
Golf Simulator Room Size: Minimum Dimensions by Launch Monitor Type
Discover the real golf simulator room size requirements you need. Learn how height, width, depth, and launch monitor tech affect your home setup.