
SkyTrak+ Setup Guide: Everything You Need to Get Playing

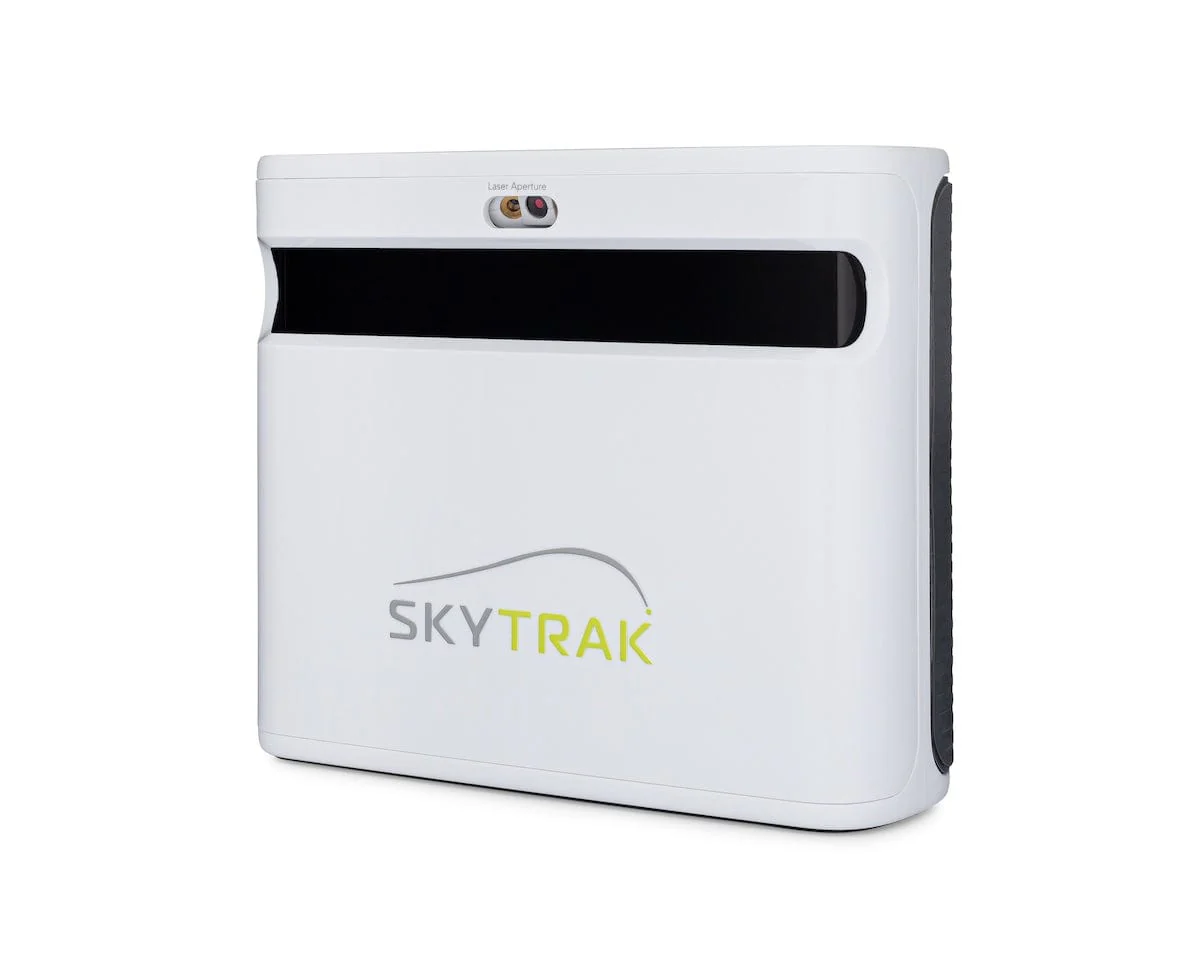
SkyTrak+ Setup Guide: Get Connected and Playing (2026)
Unboxing your launch monitor is the easy part. You are likely reading this SkyTrak+ setup guide because you are currently stuck on physical unit alignment, a dropping WiFi connection, or choosing your software path.
By the end of this guide, you will be placed correctly, connected reliably, and playing on SkyTrak native, E6 Connect, or GSPro. Just note that running GSPro on this hardware requires a community-built connector, not a native one-click install.
Step 2: Position and Align Your SkyTrak+
Do not waste hours troubleshooting what looks like a software bug or connection issue. Most tracking and accuracy errors on the SkyTrak+ stem from poor physical alignment. Because this is a camera and radar hybrid monitor, it requires precise leveling, specific ball placement, and exact target-line orientation to calculate data. Getting this wrong directly causes frustrating no-reads, exaggerated spin rates, and incorrect start lines.
Use this physical checklist before launching your simulation software:
- Level the unit with the hitting surface: Place the SkyTrak+ on the exact same vertical level as your hitting mat or the base of your tee. If you use a metal protective case, adjust the case feet to match the mat height. Setting the unit even 0.5 to 1 inch too high or too low distorts your vertical launch angle.
- Align parallel to the target line: Position the unit face parallel to your target line. Do not angle the unit toward the center of your screen if you hit off-center. Lay an alignment stick flat against the front face of the unit or inside the protective case channel to verify it runs parallel to your target line.
- Place the ball on the red laser dot: Once powered on, the unit projects a red laser dot onto your mat. Place your ball directly on this dot. The official SkyTrak+ setup guide states the cameras can read shots within a 2-to-3-inch window, but starting directly on the dot is essential for consistent calibration.
- Position the tee base for driver shots: When hitting off a tee, place the base of the tee directly on the red dot rather than centering the ball over it.
- Index your setup to prevent creep: Mat and unit drift are common failure modes during a session. Outline your unit's feet with small pieces of tape and mark a "ball dot" on your mat so you can quickly spot and correct physical drift after hard swings.
Expected Result and Troubleshooting
You have positioned the unit correctly when all three LEDs on the side turn solid green, the red laser dot appears on your mat, and you can hit 10 consecutive short pitch shots with zero no-reads.
If you experience intermittent reads, check for three common alignment failures. First, verify the unit has not drifted lower than the hitting mat surface. Second, ensure the unit face is parallel to your target line rather than angled toward the center of the screen. Finally, check that your hitting mat has not crept forward under the force of your swings, which throws off the calibrated sensor distance.
Step 3: Select Your Software and Hardware Platform
Choosing your software first is the most critical decision in this SkyTrak+ setup guide. If you pick your software last, you can waste hours chasing the wrong connection mode or discover you need a Windows PC after you already committed to an iPad. Your software choice dictates your operating system, graphics quality, and your recurring annual costs.
The table below outlines the true cost and device requirements for the three primary software paths compatible with the SkyTrak+ launch monitor.
| Software Platform | Required Device | Subscription Cost | Integration Notes |
|---|---|---|---|
| SkyTrak Native | iPad or PC | $129.99 to $599.99/year | Simplest native setup. Essential is $129.99/yr. Core (Foresight) is $299.99/yr. Core (TrackMan) is $349.99/yr. Elite is $599.99/yr. See skytrakgolf.com. |
| E6 Connect | iPad or PC | $300 or $600/year | Native integration. TruGolf subscriptions run $300 or $600 annually. See trugolf.com. |
| GSPro | Windows PC Only | $250/year | Requires unofficial community OpenSkyPlus2 connector (not endorsed by SkyTrak/GSPro). See gsprogolf.com. |
iPad vs. PC: The Honest Builder Take
Do not let forum threads convince you that you must buy a multi-thousand-dollar gaming computer to enjoy home golf. The choice comes down to your priorities:
- Choose iPad if your priority is "play tonight" simplicity. Running native SkyTrak software or E6 Connect on iOS avoids driver conflicts and Windows updates. You sacrifice high-resolution graphics, but you gain a system that boots instantly.
- Choose PC if you want to run GSPro. This software requires a Windows PC with a dedicated graphics card (GPU). A PC is also required if you want to maximize high-definition graphics, prevent frame drops on a premium projector, and avoid performance ceilings.
Your Action Item
Before proceeding to physical connection, write down your platform blueprint. Doing this prevents the most common beginner mistake of building a setup around the wrong platform and finding hidden annual costs later.
- Device: iPad or Windows PC.
- Software: SkyTrak Native, E6 Connect, or GSPro.
- Subscription Budget: Write down your Year 1 cost and your Year 3 cumulative total (for example, GSPro costs exactly $750 over three years).
Once you have defined your platform, you are ready to configure the physical connection.
Step 4: Connect Your SkyTrak+ to Your Device
Most forum complaints about SkyTrak+ software crashes or lag are actually just unstable WiFi or a poor connection mode choice. If your signal drops for even a microsecond during a swing, your shot data vanishes. Establishing a reliable link is the most critical part of this SkyTrak+ setup guide to prevent mid-session disconnects and failed shot uploads.
You have three ways to link your launch monitor to your iPad or PC:
- Direct Mode: Your device connects directly to the internal WiFi card of the SkyTrak+. SkyTrak support notes that the unit broadcasts as STPLUS_... and uses the password skytrakplus. Choose this if your hitting bay lacks home internet.
- Network Mode: Both the SkyTrak+ and your simulator device join your home WiFi router. This is the ideal option because your device retains internet access for online multiplayer and course downloads.
- USB Mode: A physical USB cable runs directly from the unit to your PC. This is the most stable option and is highly recommended if your basement or garage is crowded with wireless interference.
For a stable wireless connection, place your router or an access point within practical range of the hitting bay. If the signal is weak, fix that first by moving an access point or mesh node closer. If you have a dual-band router, create a dedicated 2.4GHz SSID specifically for your simulator gear to stop router band steering from dropping the SkyTrak+ mid-session. If Direct Mode gets stuck on "discovering" on a Windows PC, antivirus interference and Windows adapter settings conflicts are the most common culprits.
Your setup is successful when the software dashboard shows a green "connected" status within ten seconds of booting. The connection must remain rock-solid through a 20-minute test session with zero drops or re-pairing prompts.
Step 5: Configure and Launch Your Simulation Software
Aligning your hardware is only half the battle. Launching your software stacks in the wrong order causes silent connection failures. This SkyTrak+ setup guide section covers the exact prerequisite install and startup sequences for your chosen platform to avoid connection issues.
A) Native SkyTrak App Setup (iPad or PC)
If you run the native SkyTrak software, use this setup sequence:
- Register your device: Download the SkyTrak app on iOS or PC, create an account, and register your launch monitor at skytrakgolf.com.
- Pair in-app: Start in Direct Mode first to confirm the basic hardware connection before switching to your network.
- Verify status: Confirm the side LEDs are solid green and the red laser target dot displays on your hitting mat.
B) E6 Connect Setup (iPad or PC)
E6 Connect offers photorealistic courses but requires a specific startup sequence:
- Install PC prerequisites: If you use Windows, install the official SkyTrak PC software first to load the necessary driver libraries.
- Choose your connection: Use a USB cable for PC stability, or network/direct modes for iOS.
- Ignore offline warnings: If you connect via Direct Mode, ignore the standard "no internet connection" warnings.
- Understand total costs: E6 Connect costs $300 to $600 annually (details at trugolf.com). You also need an active SkyTrak Game Improvement plan ($129.95/year) to unlock the integration.
C) GSPro Setup (Windows PC Only)
GSPro costs $250/year (see gsprogolf.com) and requires a dedicated gaming PC (minimum Nvidia RTX 3060 recommended). Because SkyTrak+ does not natively support GSPro, you must use OpenSkyPlus2, an unofficial community project.
- Download the connector: Get the files from the official OpenSkyPlus2 GitHub repository.
- Start the official app first: Launch the official SkyTrak software and confirm the monitor is connected and reading live data.
- Open the community tool: Launch the OpenSkyPlus2 connector, which uses default settings like GSPro port 921 to route data (see the OpenSkyPlus2 FAQ).
- Start GSPro: Launch GSPro and connect via OpenAPI/OpenConnect.
What a Correct Result Looks Like
A successful connection allows you to hit 10 consecutive shots and see immediate ball flight and data in your chosen software. You should experience zero lag and no mid-session disconnects.
Common Mistake: Updating Software Before League Night
The easiest way to break your setup is hitting "update" on your official SkyTrak software. Official firmware updates regularly break community-built APIs like OpenSkyPlus2. Freeze your software and firmware updates, especially before hosting a league night, and let other community members test new versions first.
SkyTrak+ Setup Guide: Troubleshooting Connection and Read Errors
This SkyTrak+ setup guide troubleshooting section bypasses advanced settings to focus on the direct fixes that solve 90% of common errors.
Ball Not Detected or Frequent No-Reads
- Likely Cause: The unit is not level with your hitting surface, or ball placement is off.
- Specific Fix: Place the SkyTrak+ on the exact same vertical level as your hitting mat. Set the ball directly on the red laser dot (or the base of your tee for driver shots). Clean grass stains off the ball, wipe the camera lens window with a microfiber cloth, and eliminate any mat movement.
Driver Spin Inconsistency or No-Reads
- Likely Cause: Inconsistent ball orientation or poor radar tracking.
- Specific Fix: Point a clean ball logo or line directly toward the camera lens as a repeatable routine. If no-reads persist, make micro-adjustments. Start on the red dot, then test shifts of a quarter-inch forward or backward to map your bay's unique sweet spot.
Shots Launch Consistently Left or Right
- Likely Cause: The unit is physically rotated relative to your target.
- Specific Fix: Lay an alignment stick parallel to the unit and verify it aligns with your target line. Mark the unit's exact mat placement with tape to prevent rotation over time.
Network Drops and Disconnects
- Likely Cause: Wi-Fi band-steering or network adapter conflicts.
- Specific Fix: Use a physical USB connection where possible. For Wi-Fi, use a dedicated 2.4GHz SSID near the bay to avoid band-steering drops. If Windows Direct Mode fails, check for antivirus blocks and verify your adapter settings.
GSPro Fails to Connect After an Update
- Likely Cause: Outdated community connection software.
- Specific Fix: OpenSkyPlus2 is community-built and can break during official firmware updates. Go to the OpenSkyPlus2 GitHub page to download the latest connector version before troubleshooting further.
The 60-Second Reset Routine
If your setup freezes, run this sequence instead of changing random settings:
- Power down the SkyTrak+ and close all software on your PC or iPad.
- Power on the unit and verify solid LED lights and a visible red laser dot.
- Confirm your network or USB connection is stable.
- Launch software in this exact order: SkyTrak official app first, connector software second, and GSPro last.
The Bottom Line
Following this SkyTrak+ setup guide means your home simulator is no longer an endless loop of dropped connections and missed shots. You now know exactly how to align your unit, route your cables, and sequence your software to build a stable hitting bay.
Your next step depends on how you want to play:
- Fastest path to playing tonight: Pair an iPad with the native SkyTrak app in Direct Mode. Move to Network Mode only if you need an active internet connection.
- Most stable group night: Run E6 Connect on a PC or iPad. If you use a PC, prioritize a physical USB cable over Wi-Fi to completely eliminate wireless drops.
- Best graphics and depth: Commit to a Windows PC running GSPro, but keep in mind that the SkyTrak+ currently relies on the community-built OpenSkyPlus2 connector.
If you are still weighing your software options before committing to an annual subscription, read our GSPro vs E6 Connect comparison to find your perfect match.
Once your platform is locked, run a 10-shot validation test using chips, wedges, a 7-iron, and a driver. Get those reads registering consistently first, and only then start tweaking your settings.
Frequently Asked Questions
Do I need a PC for SkyTrak+?
You do not need a PC if you run the native SkyTrak app or E6 Connect, as both run natively on iOS devices like an iPad. However, you will need a Windows PC with a dedicated graphics card if you want to play GSPro. A PC is also highly recommended if you want to run high-definition graphics through a 1080p or 4K projector.
Does SkyTrak+ support GSPro officially?
No, SkyTrak+ does not officially support GSPro. You must use an unofficial, community-built program called the OpenSkyPlus2 connector to bridge the launch monitor and the software. Keep in mind that because this integration is unofficial, future SkyTrak firmware updates can break the connection until community developers release a patch.
What is the SkyTrak+ Direct Mode WiFi password?
The default password for SkyTrak+ Direct Mode is "skytrakplus" in lowercase. When you turn on the unit, look for a wireless network named "STPLUS" followed by your unit serial number in your device settings. Connect to this network using the password to establish a direct, offline link.
Network Mode vs Direct Mode vs USB: Which should I use?
You should use a physical USB cable if you play on a PC because it is the most stable option and completely avoids wireless interference in noisy environments. Use Network Mode if you use an iPad and need a live internet connection for online multiplayer. Direct Mode is best reserved for initial setup pairing or offline bays.
Why is my SkyTrak+ shot start line always off?
Your start line is off because the launch monitor is physically rotated relative to your target. The internal cameras calculate ball flight relative to the unit. If the face is angled even slightly, your shots will pull or push. Lay an alignment stick flat against the unit face to ensure it runs parallel to your target line.
What annual subscriptions do I need for SkyTrak+?
You need to budget for the $129.99 per year SkyTrak Essential plan at minimum to unlock third-party software integrations. On top of that, GSPro costs $250 annually, while E6 Connect subscriptions cost $300 or $600 per year. Running a GSPro setup on a SkyTrak+ will cost you a total of $379.99 every year.
Related Guides
Square Golf Omni Setup Guide (2026): First Run and GSPro Connection
Master your Square Golf Omni setup with our step-by-step guide. Learn exact Ready Zone dimensions, app calibration, and how to connect to GSPro cleanly.
How to Build a Golf Simulator in Your Garage: Step-by-Step (2026)
Learn how to build a golf simulator in your garage with this step-by-step 2026 guide. Get exact clearance dimensions, costs, and projector setup tips.
Golf Simulator for Small Rooms: Best Setups Under 12 Feet Deep
Need a golf simulator small room setup? Discover the best camera-based and overhead builds under 12 feet deep with real placement math, costs, and gear.