How to Set Up the Garmin R10 as a Full Golf Simulator (Step-by-Step)

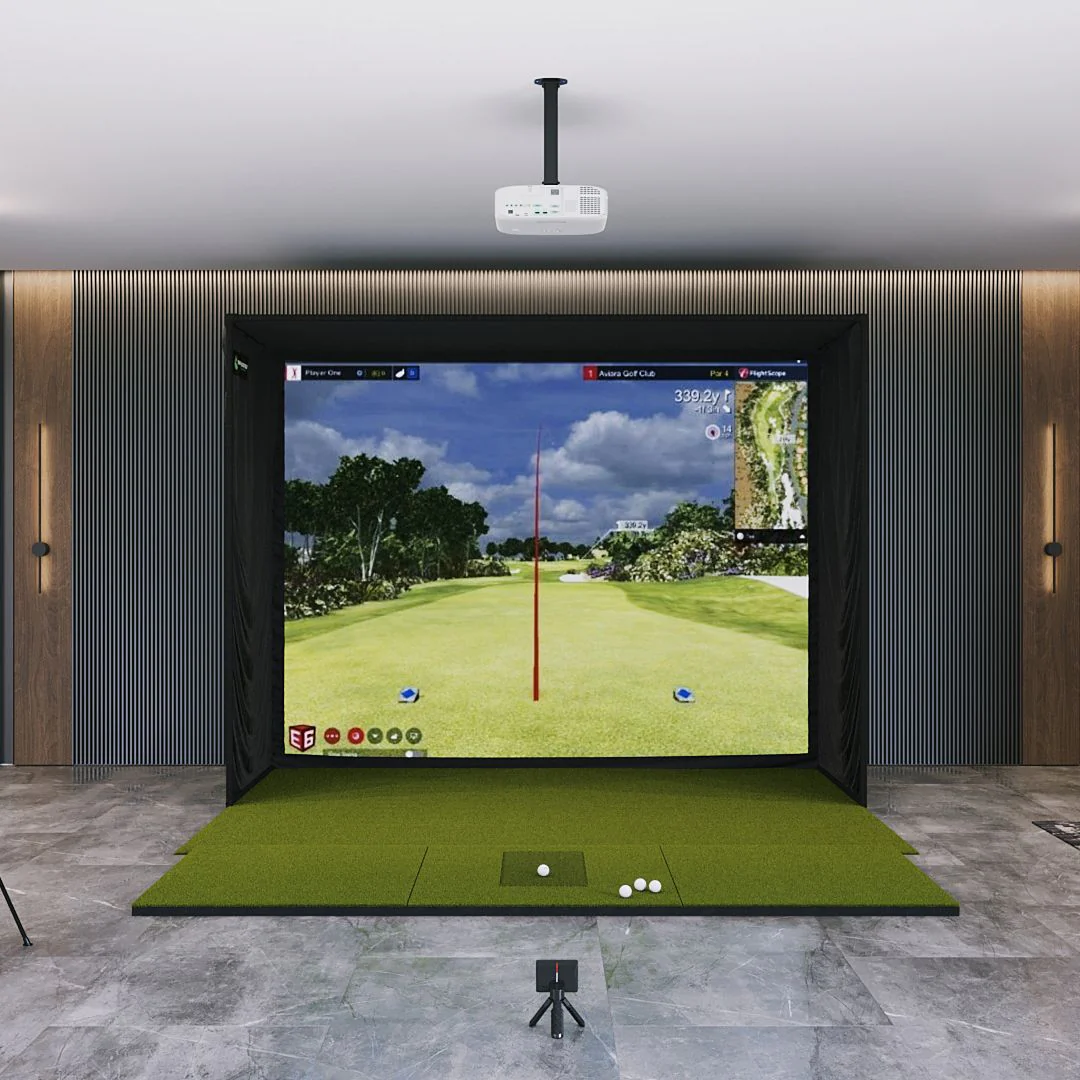
Garmin R10 Simulator Setup Guide: How to Get It Right Indoors (2026)
You already own the launch monitor, but finding a cohesive Garmin R10 simulator setup guide that cleanly bridges the Garmin Golf app, E6, and GSPro is a nightmare of fragmented forum threads. This walkthrough replaces that headache. You will learn to place the radar correctly indoors, level it, connect your chosen software, and hit your first calibrated shot. Because GSPro is community-supported, expect some troubleshooting. Let’s dial in your hardware checklist first so you only build this once.
Garmin R10 + GSPro Setup Guide
Step 1: Choose Your Software and Gather Your Gear
Many golfers unbox their launch monitor and hit balls before checking software compatibility, only to realize their PC cannot run the software or their room is too short. Because the Garmin Approach R10 supports multiple simulator platforms, your space, PC specs, and costs depend entirely on this choice. Choose your software first to avoid wasted hours and unexpected costs.
The Three Main Software Paths
- GSPro: The community standard for realistic physics and 500+ courses. Requires a dedicated Windows gaming PC and uses a community connector to receive R10 data.
- E6 Connect: A polished option with a free five-course iOS license included with your R10. Standard PC licensing requires a separate subscription.
- Home Tee Hero: Garmin’s native app. Provides 43,000 3D courses with basic, cartoon-style graphics. Runs on iOS or Android and requires a subscription.
3-Year Total Cost of Ownership
Determine your three-year cost commitment before buying physical accessories.
| Software Option | Annual Subscription | 3-Year Total Cost (With $599 R10) |
|---|---|---|
| E6 Connect (iOS Starter) | $0 (Basic package) | $599 |
| Garmin Home Tee Hero | $99.99/year | $899 |
| GSPro | $250/year | $1,349 (Plus Windows PC) |
Your Pre-Setup Checklist
Verify these hardware and safety requirements before launching any apps:
- [ ] Firmware: Updated via Garmin Express to prevent connection drops.
- [ ] Garmin Golf App: Installed on your phone or tablet with Bluetooth enabled.
- [ ] Space: Minimum 6 to 8 feet from R10 to ball, and 8+ feet from ball to screen. This requires 14 to 16 feet of total room depth.
- [ ] PC Specs (GSPro): Windows PC with an Nvidia GTX 1080/RTX 3060 graphics card or better.
- [ ] Alignment tools: Leveling stand, bubble level, and an alignment stick or laser.
- [ ] Titleist RCT balls: Highly recommended to measure indoor ball spin instead of estimating it.
- [ ] Safety: Net or screen secured, with side protection for shanked shots.
What Correct Looks Like
You can point to one chosen software path, your PC or mobile device meets the technical specs, and you have gathered all alignment tools.
Common mistake to avoid: Physical placement before software selection. If you set up your net and mat first, you risk discovering your room is too short for the R10 radar to read GSPro, forcing you to tear down and start over. Software first, physical layout second.
Step 2: Update Firmware and Pair the R10
Do not try to debug a GSPro connection when your launch monitor has unstable firmware. You must make the R10 stable within the Garmin ecosystem before connecting third-party software. Completing this stage of your Garmin R10 simulator setup guide ensures you do not chase phantom software bugs. If the baseline Bluetooth connection is flaky, downstream troubleshooting is impossible.
Update the Firmware (Two-Path Playbook)
Get your firmware up to date so the radar can utilize indoor accuracy updates, including Titleist RCT spin capture.
- Path A (Over-the-Air): Open the Garmin Golf app with the R10 turned on and connected. The app automatically downloads and pushes the update. This is the fastest method but requires stable Wi-Fi.
- Path B (Garmin Express Recovery): If the over-the-air update fails, plug your R10 into a PC using a USB-C cable and run the Garmin Express desktop application. This forces a clean, wired installation.
Establish Your Bluetooth Pairing Hygiene
Fully charge your R10 before pairing. Open the Garmin Golf app and initiate pairing directly inside the app interface, not your phone's system Bluetooth settings. Confirm the LED indicator flashes green and stays connected.
Run a Baseline Indoor Session
Before launching E6 Connect or GSPro, open the Garmin Golf driving range. Hit 10 shots using the exact club, mat, and ball you plan to use. Track whether the unit registers every swing, and watch for "no reads" or estimated spin.
What Correct Looks Like
The R10 connects immediately upon power-up, and you complete a 10-shot test session in the Garmin Golf app with zero disconnects.
Common Mistake to Avoid
Do not try to troubleshoot GSPro connection issues or E6 licenses while your R10 runs outdated firmware. Fix the native hardware connection first.
Troubleshooting Quick Fixes
- If Bluetooth drops: Toggle airplane mode, turn Wi-Fi and Bluetooth back on, delete the R10 from your saved devices, and re-pair through the Garmin Golf app. Keep your phone within three feet of the unit.
- If indoor reads differ from outdoors: Indoor radar is highly sensitive to reflective surfaces. Step 5 of this guide will walk you through correcting physical alignment and neutralizing room interference.
Step 3: Connect and Configure Your Simulation Software
Most connection failures during a Garmin R10 simulator setup trace back to software licensing, platform confusion, or an underpowered computer. You must establish a clean software pathway before pairing the hardware.
Track A: GSPro (Windows PC)
First, install GSPro and verify you can launch the local driving range without the launch monitor connected. If the software lags, your PC is the bottleneck. For GSPro, your graphics card (GPU) dictates performance, not your processor. You need at least an Nvidia GTX 1080 or RTX 3060 to run courses at acceptable frame rates.
When you launch GSPro, the GSPro Connect window opens automatically. This utility acts as the data bridge for your Garmin R10. It must remain open in the background during play or shot registration will stop.
Track B: E6 Connect (iOS vs. PC)
Clarify your platform before configuring E6 Connect. An iPad allows you to use the five free courses included with the R10, but the PC version requires a separate paid license.
Redeeming the free iOS license requires a specific workflow:
- Open the Garmin Golf app and navigate to the E6 Connect integration page.
- Tap the link to generate your unique product key.
- Open E6 Connect and load the default driving range to verify it runs before linking the R10.
If you bought a secondhand R10, the free courses might still be bound to the previous owner's Garmin account. You must contact Garmin support to unbind the device serial number before redeeming.
What "Correct" Looks Like
Your simulation software launches, you can load into a practice session, and your license status shows active in your profile dashboard.
Common Mistake to Avoid
Do not assume the free iOS E6 Connect license translates to a PC license. They are separate platforms. Similarly, do not purchase GSPro if you run a Mac; it requires a dedicated Windows PC.
Troubleshooting Quick Fixes
- If GSPro runs poorly: Open the GSPro launcher and lower the graphics settings to isolate whether your GPU is struggling.
- If E6 courses are locked: Verify that your E6 login email matches your Garmin Golf account email. Email mismatch is the most common reason licenses fail to bind.
Step 4: Link Your Garmin R10 to GSPro and E6 Connect
The Garmin R10 does not natively connect to GSPro. This step is the most common roadblock in a Garmin R10 simulator setup guide, forcing many players to hunt through forums. To bridge the gap, you must use an unofficial, community-developed connector that acts as a local relay app on your PC.
The GSPro Connection Workflow
- Download the latest R10 Connection Server release from the community GitHub repository.
- Extract the ZIP folder and run the executable file to launch the local server.
- Copy the exact IP:port address displayed in the server window.
- Open the Garmin Golf app on your phone, select "Play on PC", and enter that IP:port.
- Start GSPro on your PC and keep the GSPro Connect window open in the background.
- Click the test shot button in the connector to verify GSPro registers data before you swing.
Before hitting real shots, run through this network checklist:
- Same Network: Ensure your phone and PC share the exact same Wi-Fi band, not a guest network or separate 2.4GHz and 5GHz channels.
- Firewall Rules: Create Windows Firewall inbound and outbound rules for both the connector executable and your chosen port.
- Network Interfaces: If your PC uses Ethernet and Wi-Fi, verify the connector targets the Wi-Fi IP address.
The E6 Connect Workflow
Garmin supports E6 Connect natively, making setup more direct:
- Open the Garmin Golf app, tap Golf Sim, select Other Simulators, and choose E6 Connect.
- Select "Play on iOS" or "Play on PC" depending on your hardware.
- Confirm E6 detects the R10 and registers ball data in a range session before playing.
What "Correct" Looks Like
A successful connection means you hit a ball and the shot registers in your software instantly. The connection should remain stable throughout your session without requiring manual re-pairing between swings.
Troubleshooting and Common Mistakes
The most frequent mistake is closing the GSPro Connect window mid-round, which immediately cuts the data link. If your PC has multiple network interfaces, double-check that you did not type the wrong IP address into your phone.
If the connection drops every few minutes, disable Windows PC power-saving settings on your network card and verify your antivirus is not blocking the relay. When the software shows a connection but shots do not register, confirm the Garmin app is still in "Play on PC" mode and double-check your IP:port inputs.
Step 5: Align, Level, and Calibrate the Radar
A millimeter of physical tilt turns a straight shot into a twenty-yard slice on your screen. Radar-based units are highly sensitive to geometry. If your physical setup is slightly off, you will experience the classic indoor accuracy issues often left out of a basic Garmin R10 simulator setup guide: constant push or pull start lines, exaggerated spin axis, and random carry distances.
Nail the Space Math
Never eyeball your distances. Stick to these precise dimensions:
- R10 to ball: Place the unit exactly 6 to 8 feet behind your hitting position.
- Ball to screen: Maintain a minimum of 8 feet of ball flight. If using Titleist RCT balls, Garmin support calls for at least 8 feet of flight so the radar can capture the 2 full ball rotations needed to calculate spin.
- Total room depth: Plan on a 14 to 16 foot absolute functional minimum.
Leveling and Direct Alignment
The launch monitor must sit at the exact same height as the ball. If you hit off a thick mat, raise the R10 to match. Use a leveling stand with adjustable feet and a bubble level to get the unit flat.
Just 1 degree of tilt or yaw tells the radar your target line is shifted, causing wrong start directions. Use an alignment stick or a laser level to align the face of the R10 perfectly parallel to your target line.
Clear the Interference Cone
Radar signals bounce off metal and moving objects, causing bad reads. Clear these culprits from your space:
- Uncovered concrete: Cover concrete between the unit and screen with turf or rubber tiles.
- Moving air: Turn off ceiling fans, HVAC vents, and space heaters during use.
- Metal and motors: Keep metal garage doors, fluorescent ballasts, and refrigerators out of the radar cone.
Calibrate and Validate
Open the Garmin Golf app, go to Device Settings, and run the calibration to set the baseline digital tilt.
Validate the setup by hitting 10 mid-irons and 10 drivers. Look for systematic bias, like every shot pushing right, versus normal variance. If shots look realistic, load up GSPro or E6 Connect. Play 3 holes on a forgiving course while watching for zero no-reads, realistic carry, and believable spin shapes.
Common mistake to avoid: Treating "6 to 8 feet behind" as optional. Eyeballing this setup is how you get an indoor simulator that feels wrong even when the software says it is connected.
Your Garmin R10 simulator setup guide is complete once you have a fully updated launch monitor cleanly paired to your app, your software licensed, and shots registering. At this point, your device sits perfectly level, exactly 6 to 8 feet behind the ball, with a repeatable start-up workflow for every single session. You should now see consistent shot shapes without the common phantom reads or missed swings that plague uncalibrated setups.
Where you go next depends on your priority. For the easiest plug-and-play experience, stick to Home Tee Hero with an active Garmin Golf membership. If you want the best PC simulation, read our [Garmin R10 GSPro compatibility guide] to set up the community connector, or add Titleist RCT balls and verify you have 8 feet of ball flight to cure indoor spin issues.
If shots still fail to register, do not spend money on new hardware just yet. Run through the physical troubleshooting questions in our FAQ to dial in your alignment. Most indoor tracking errors are not hardware defects, but rather minor room geometry problems waiting for a simple physical adjustment.
Frequently Asked Questions
Do I need a PC to use the Garmin R10 indoors as a simulator?
No, you do not need a PC if you play Garmin Home Tee Hero or use E6 Connect on an iPad. However, you must have a Windows PC with an Nvidia GTX 1080 or RTX 3060 graphics card or better if you want to run GSPro. Macs and mobile devices are not supported for GSPro simulation.
What room depth do I actually need for an indoor R10 setup?
You need a minimum of 14 to 16 feet of total room depth. The physical layout requires placing the R10 exactly 6 to 8 feet behind your hitting position, plus leaving at least 8 feet of ball flight from the ball to the screen. You should also add a foot of buffer space behind your screen for safety.
Why is my indoor spin way off, and do I need Titleist RCT balls?
Your indoor spin is off because the R10 estimates spin indoors rather than measuring it directly. Yes, you need Titleist RCT balls to fix this, as their internal metallic markers allow the radar to measure actual spin. You also need at least 8 feet of ball flight and current R10 firmware for this tracking to work.
GSPro worked yesterday. Why did it stop reading shots mid-round?
The most common reason is that your local PC IP address changed or the GSPro Connect window was minimized or closed. Routers often assign a new IP address to your PC when they reboot or when you switch from Wi-Fi to Ethernet, which breaks the community connector link. Keep the connector window open and verify your firewall is not blocking the ports.
How do I redeem the 5 free E6 courses, and what if my R10 is used?
You redeem the courses on an iOS device by tapping "Other Simulators" then "E6 Connect" inside the Garmin Golf app. If you bought your R10 used, the license is likely still bound to the previous owner's email. You must contact Garmin support with your serial number to unbind the device before you can redeem your courses.
Do I need a Garmin Golf membership if I only use GSPro or E6?
No, you do not need a Garmin membership if you only use GSPro or E6 Connect. However, you must still budget for the software subscriptions themselves, like the $250 annual fee for GSPro. Your 3-year total cost of ownership for an R10 with GSPro is $1,349, not including the required Windows gaming PC.
Related Guides
Square Golf Omni Setup Guide (2026): First Run and GSPro Connection
Master your Square Golf Omni setup with our step-by-step guide. Learn exact Ready Zone dimensions, app calibration, and how to connect to GSPro cleanly.
How to Build a Golf Simulator in Your Garage: Step-by-Step (2026)
Learn how to build a golf simulator in your garage with this step-by-step 2026 guide. Get exact clearance dimensions, costs, and projector setup tips.
Golf Simulator for Small Rooms: Best Setups Under 12 Feet Deep
Need a golf simulator small room setup? Discover the best camera-based and overhead builds under 12 feet deep with real placement math, costs, and gear.